MCP Catalog
Use Keycard's built-in MCP Catalog to install pre-configured MCP servers protected by your zone's identity and policy layer
The MCP Catalog is a built-in collection of official MCP servers published by providers like Linear, Sentry, Notion, and more. These aren’t community forks — each server is built and maintained by the provider itself. When you install a server from the catalog, the Keycard MCP Gateway sits in front of the official remote MCP server and gives you a protected URL to use instead — enforcing your zone’s identity provider, access policies, and audit logging on every tool call.
What’s in the Catalog
Section titled “What’s in the Catalog”


Why the Keycard MCP Gateway Matters
Section titled “Why the Keycard MCP Gateway Matters”Without Keycard, connecting to a remote MCP server means each user authenticates independently with no centralized visibility into what tools are being used or by whom.
The Keycard MCP Gateway sits between your development tools and the remote MCP server, providing:
- Identity-based access - users authenticate with your zone’s identity provider (e.g., Okta, Auth0) via standard OAuth flows, giving you a single authentication layer across all MCP servers
- Policy enforcement - access policies control which users and applications can access which MCP servers
- Audit trail - every MCP server access is logged with the authenticated user’s identity
- Automatic credential management - Keycard handles OAuth token exchange, refresh, and lifecycle with the remote MCP server on the user’s behalf
Prerequisites
Section titled “Prerequisites”- A Keycard zone with an identity provider connected (e.g., Okta, Auth0, Google)
- Create application permission in your zone
Add an MCP Server to Your Gateway
Section titled “Add an MCP Server to Your Gateway”Adding an MCP server is a two-step process: first you install it to your zone’s Keycard MCP Gateway from the catalog, then you connect it to your development tools.
Step 1: Install to Keycard MCP Gateway
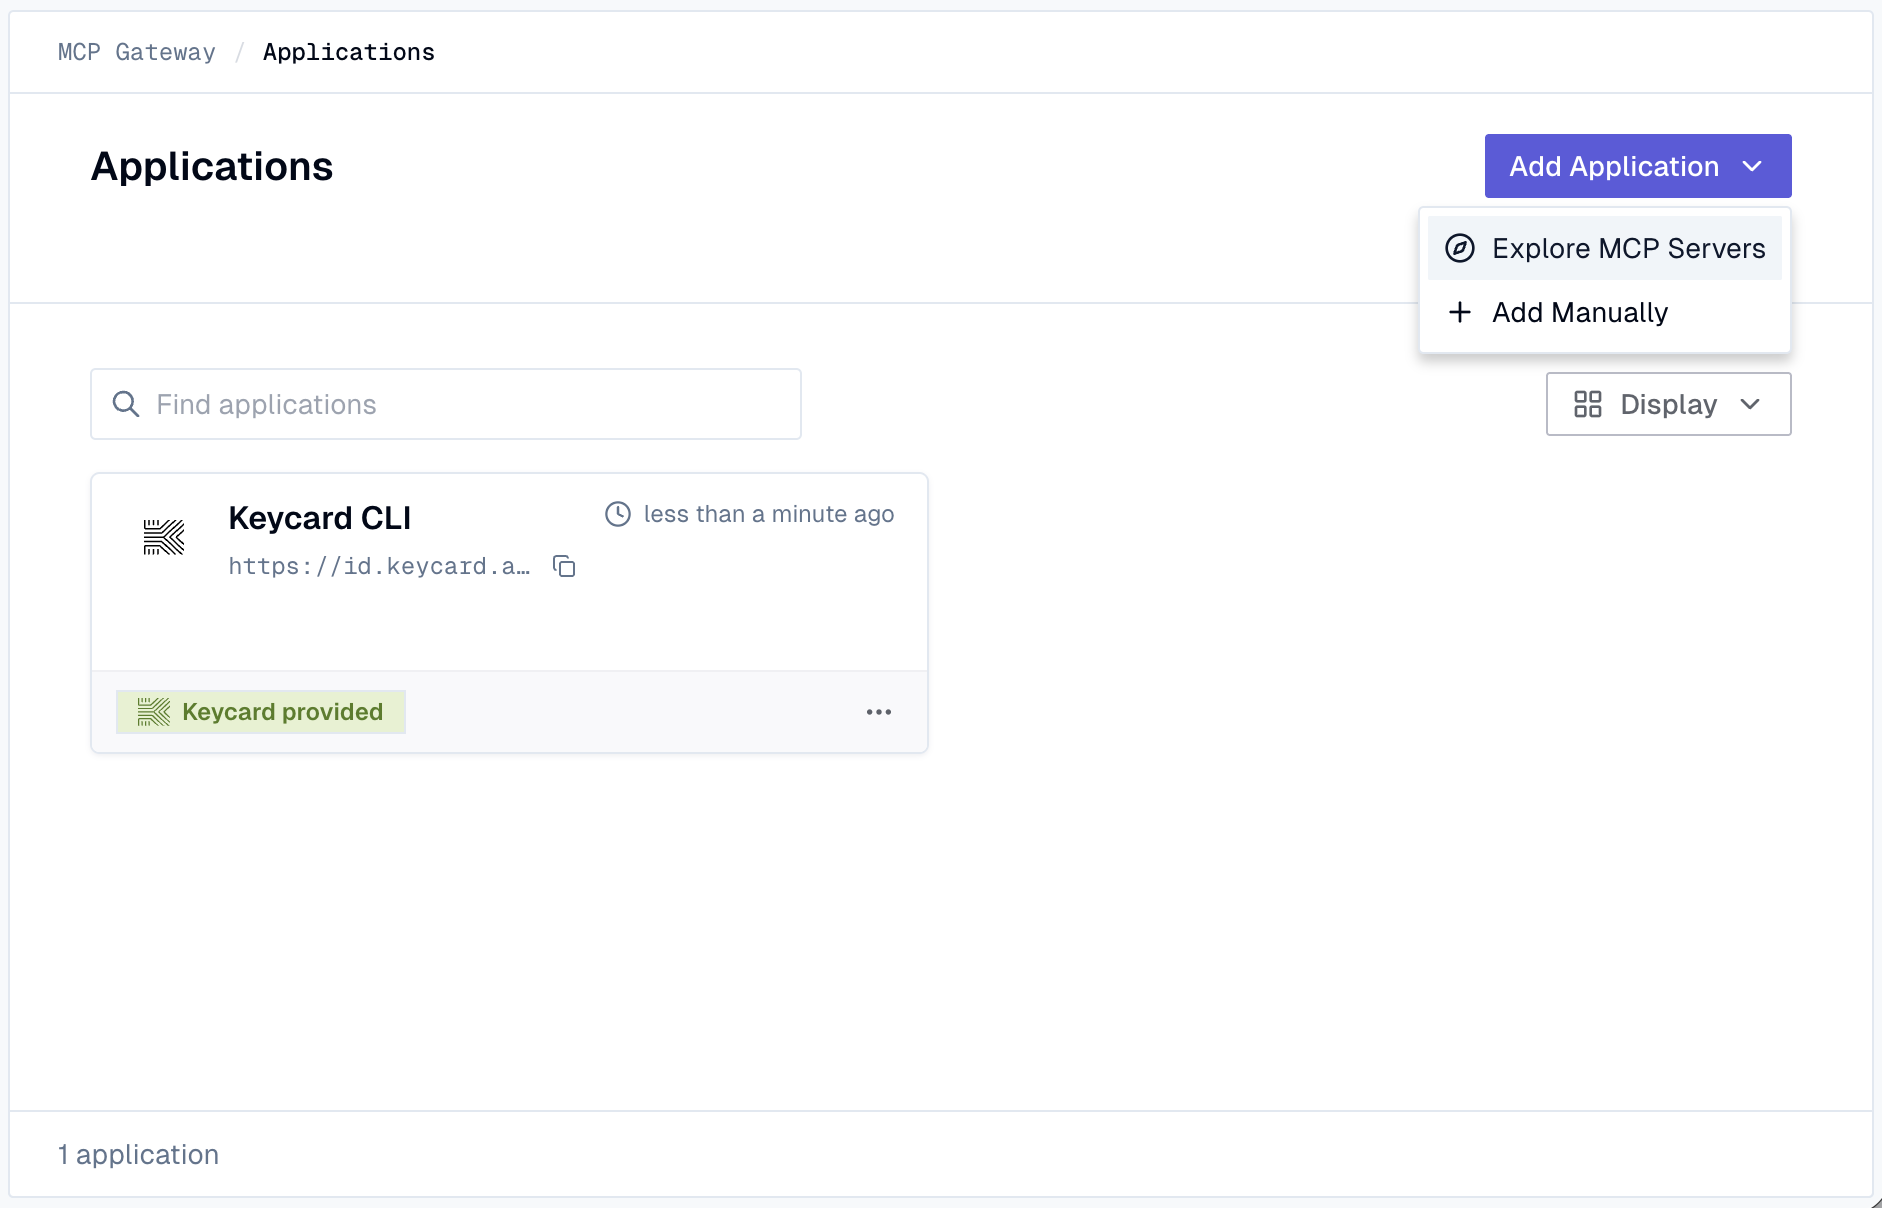
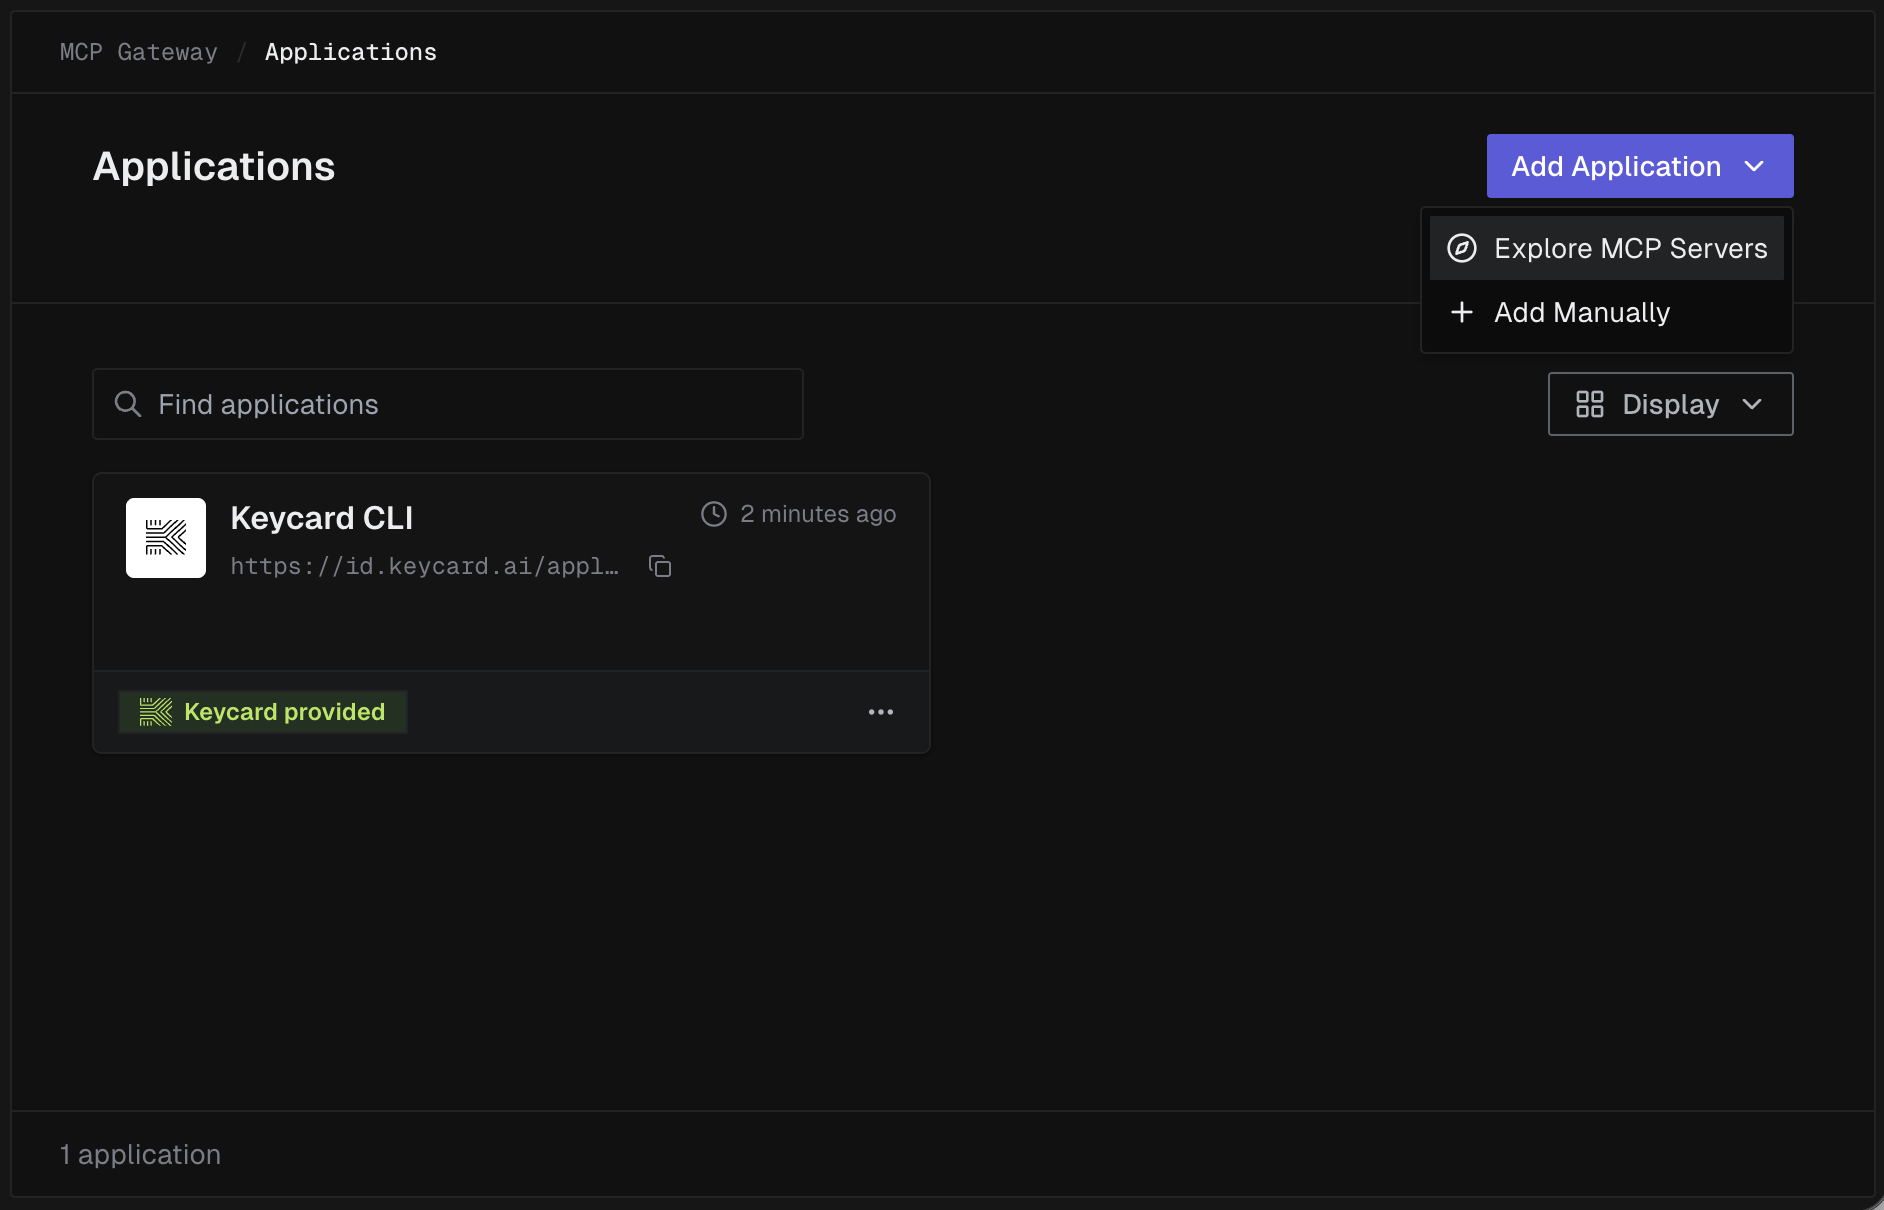
Section titled “Step 1: Install to Keycard MCP Gateway”Navigate to Applications in your zone’s Keycard Console, click Add Application, then select Explore MCP Servers.
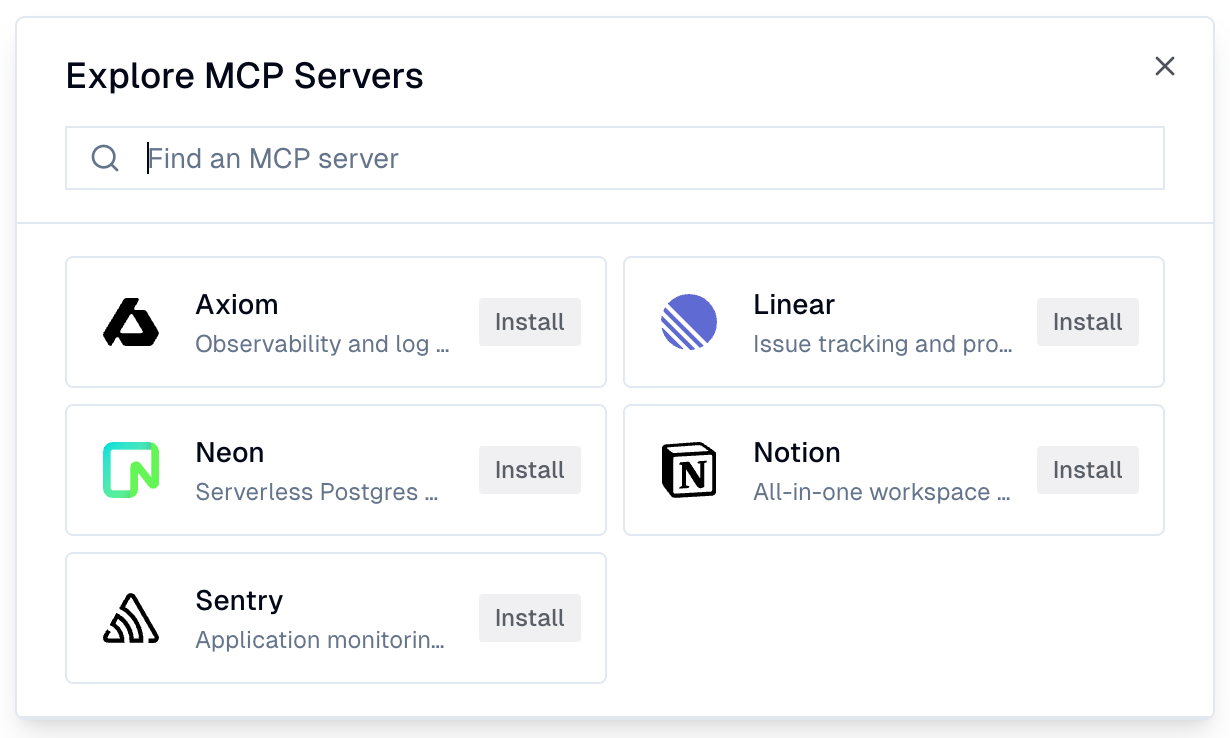
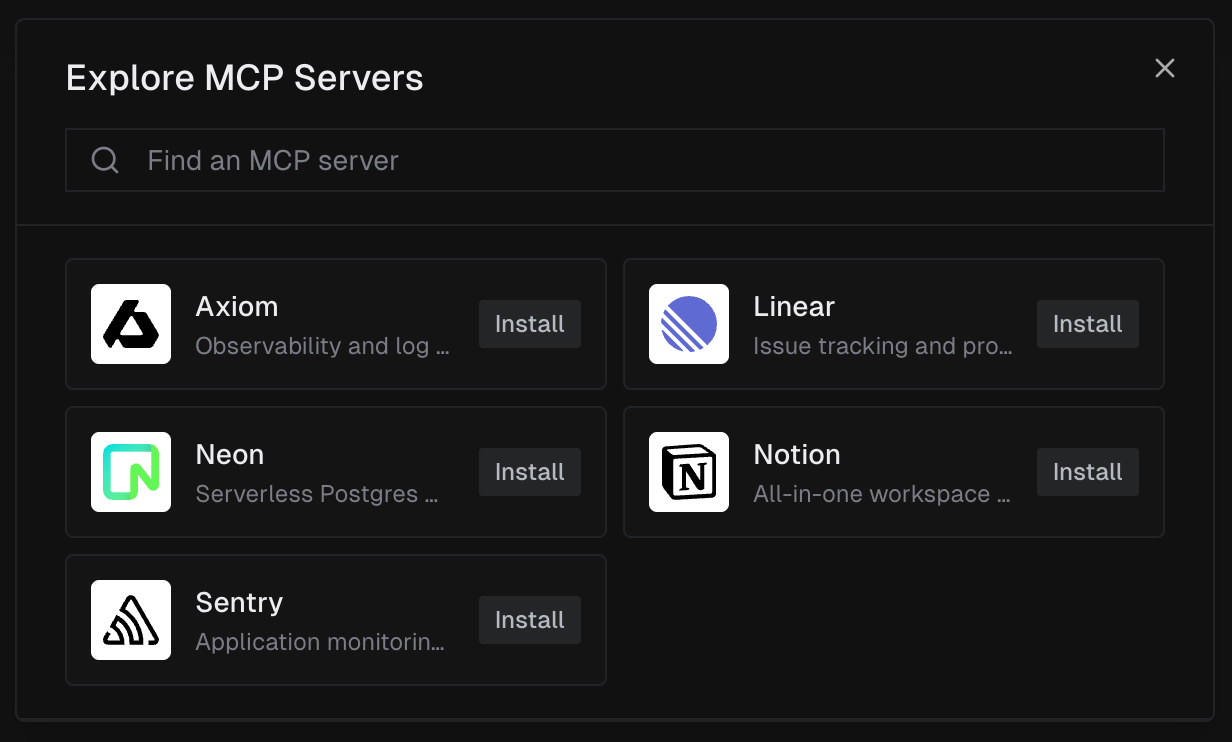
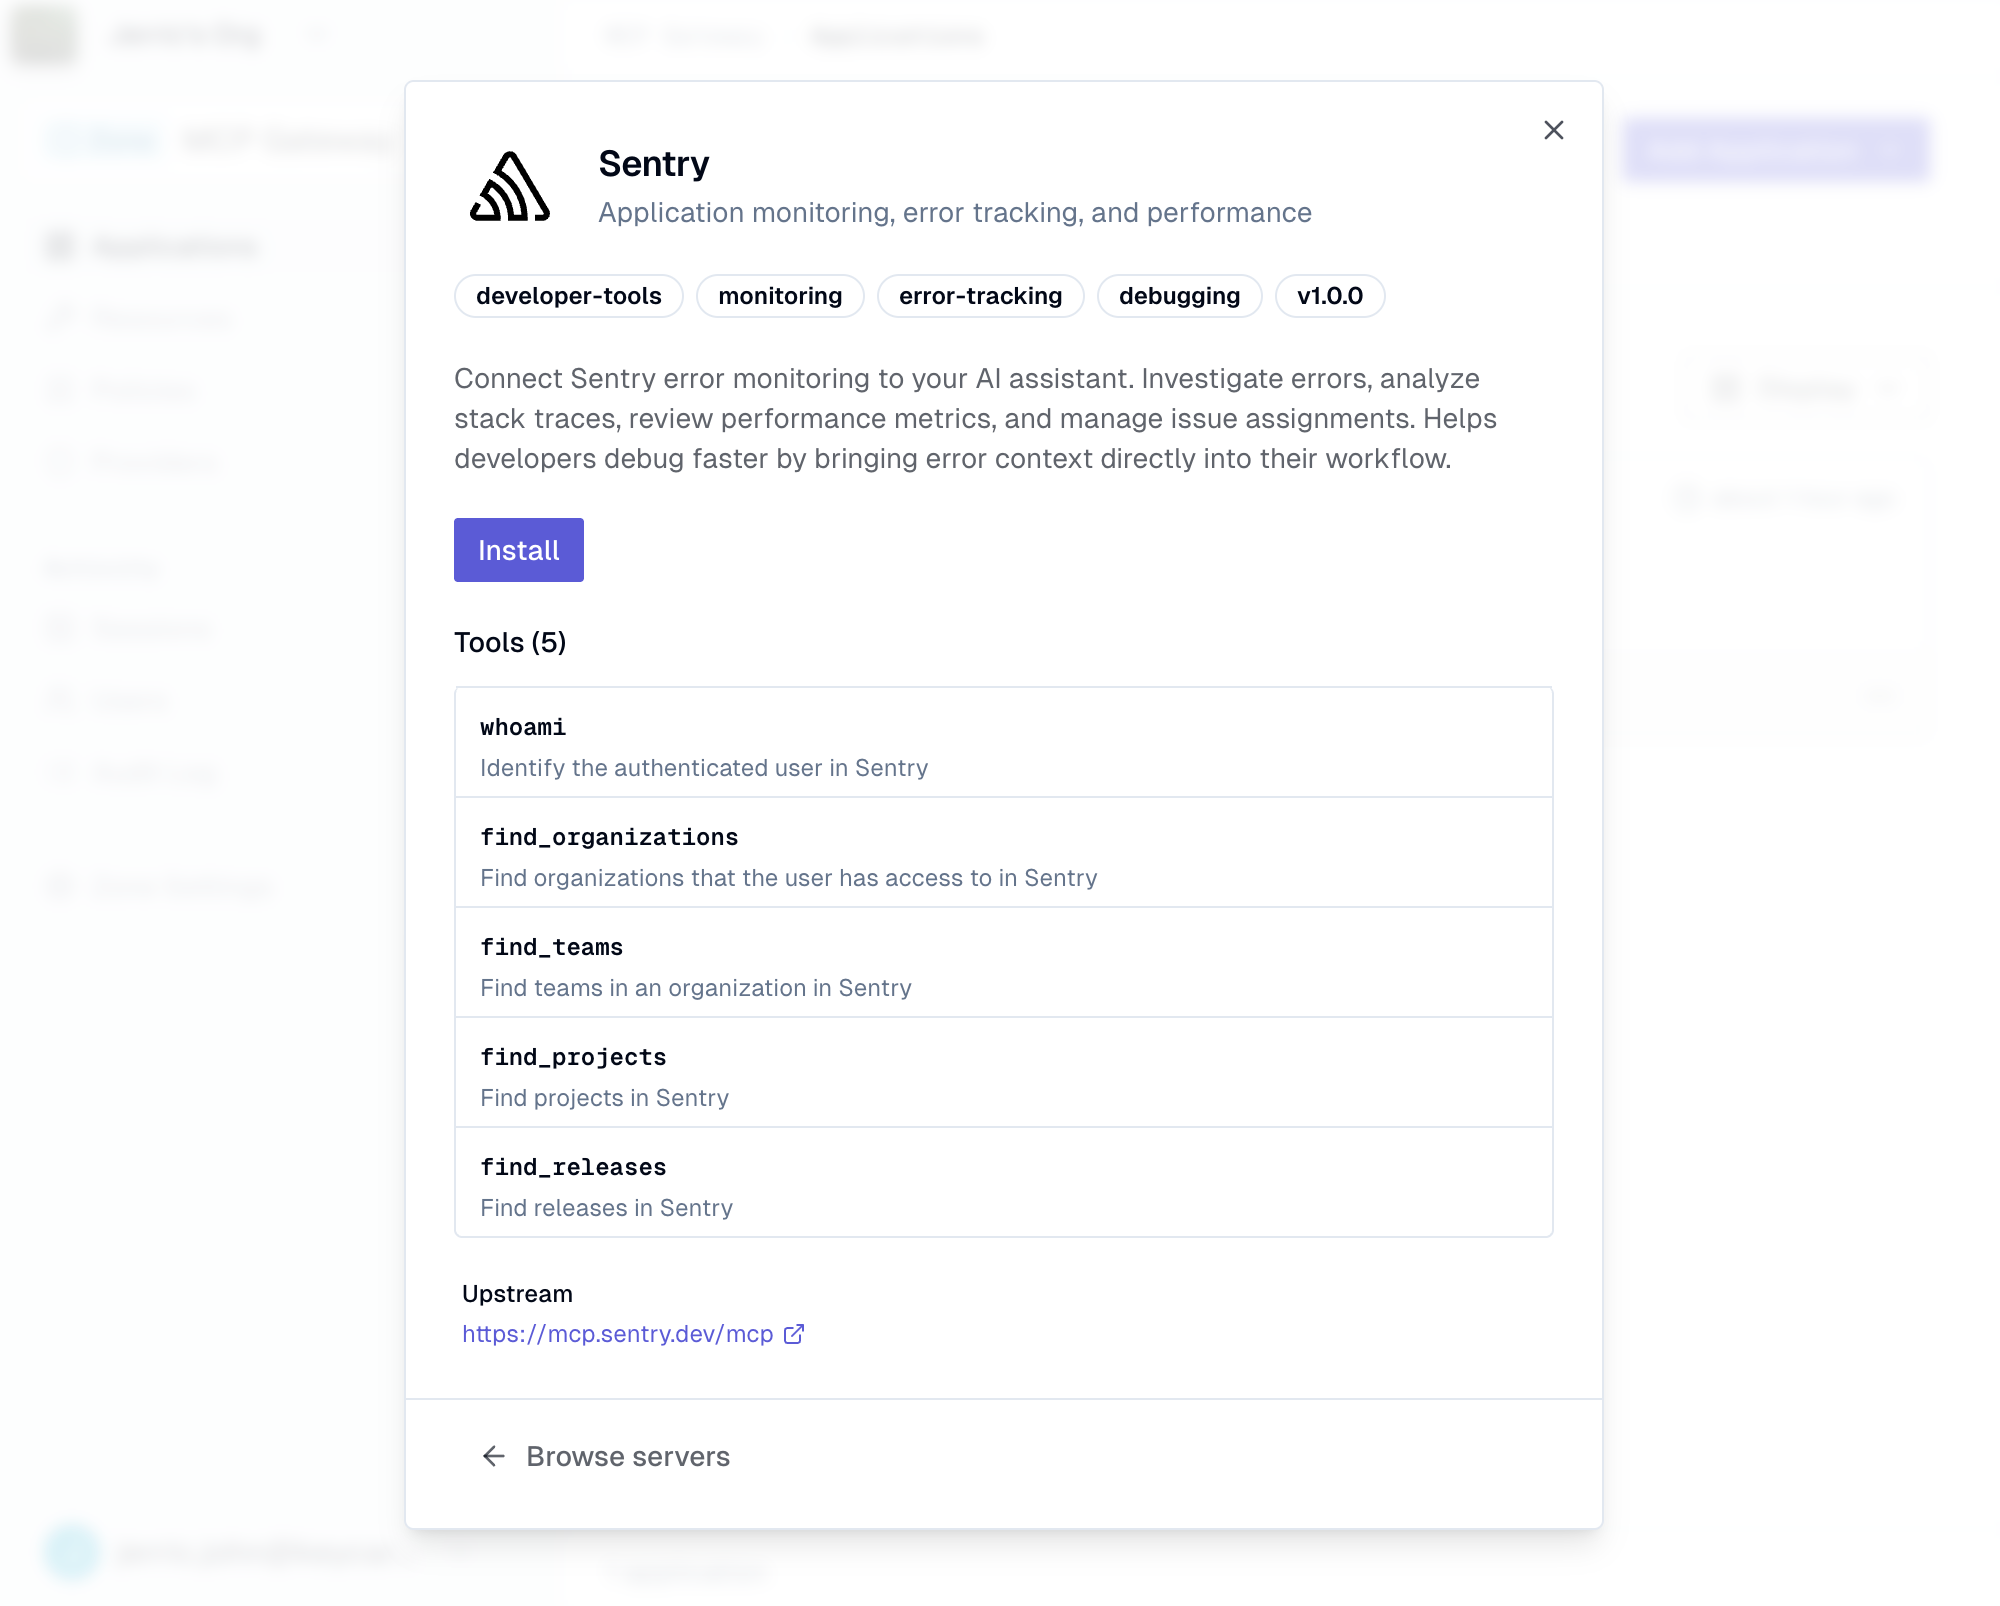
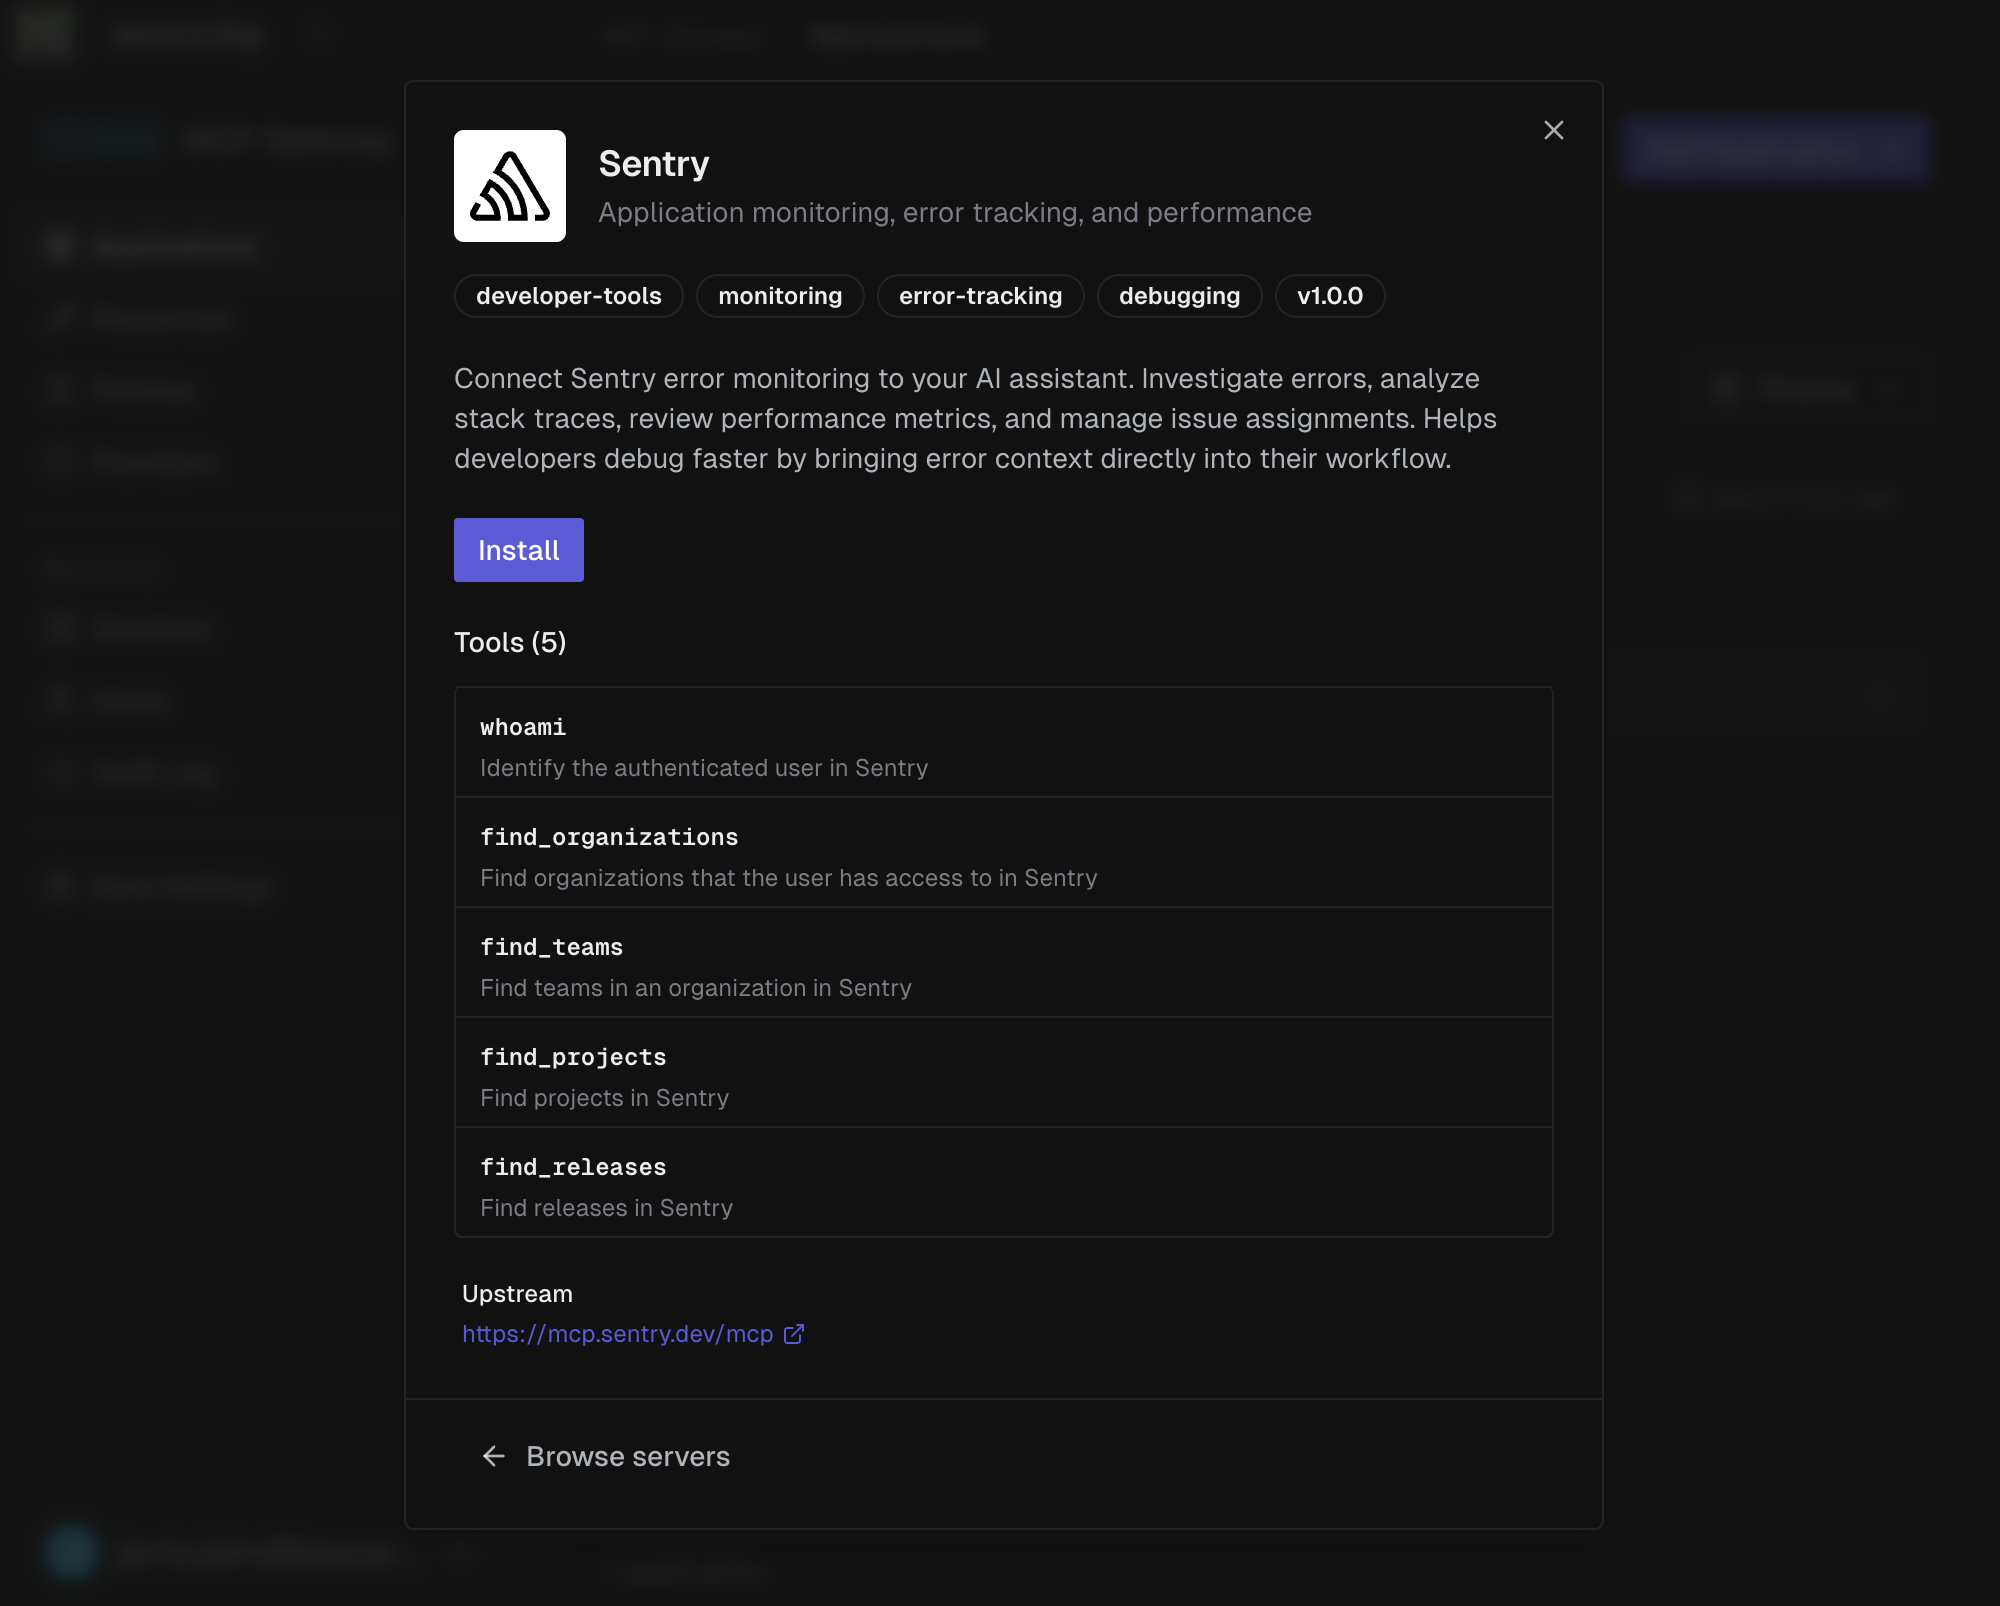
Browse the grid or use the search bar to find an MCP server. You can click Install directly from the grid, or click a server to view its details first.
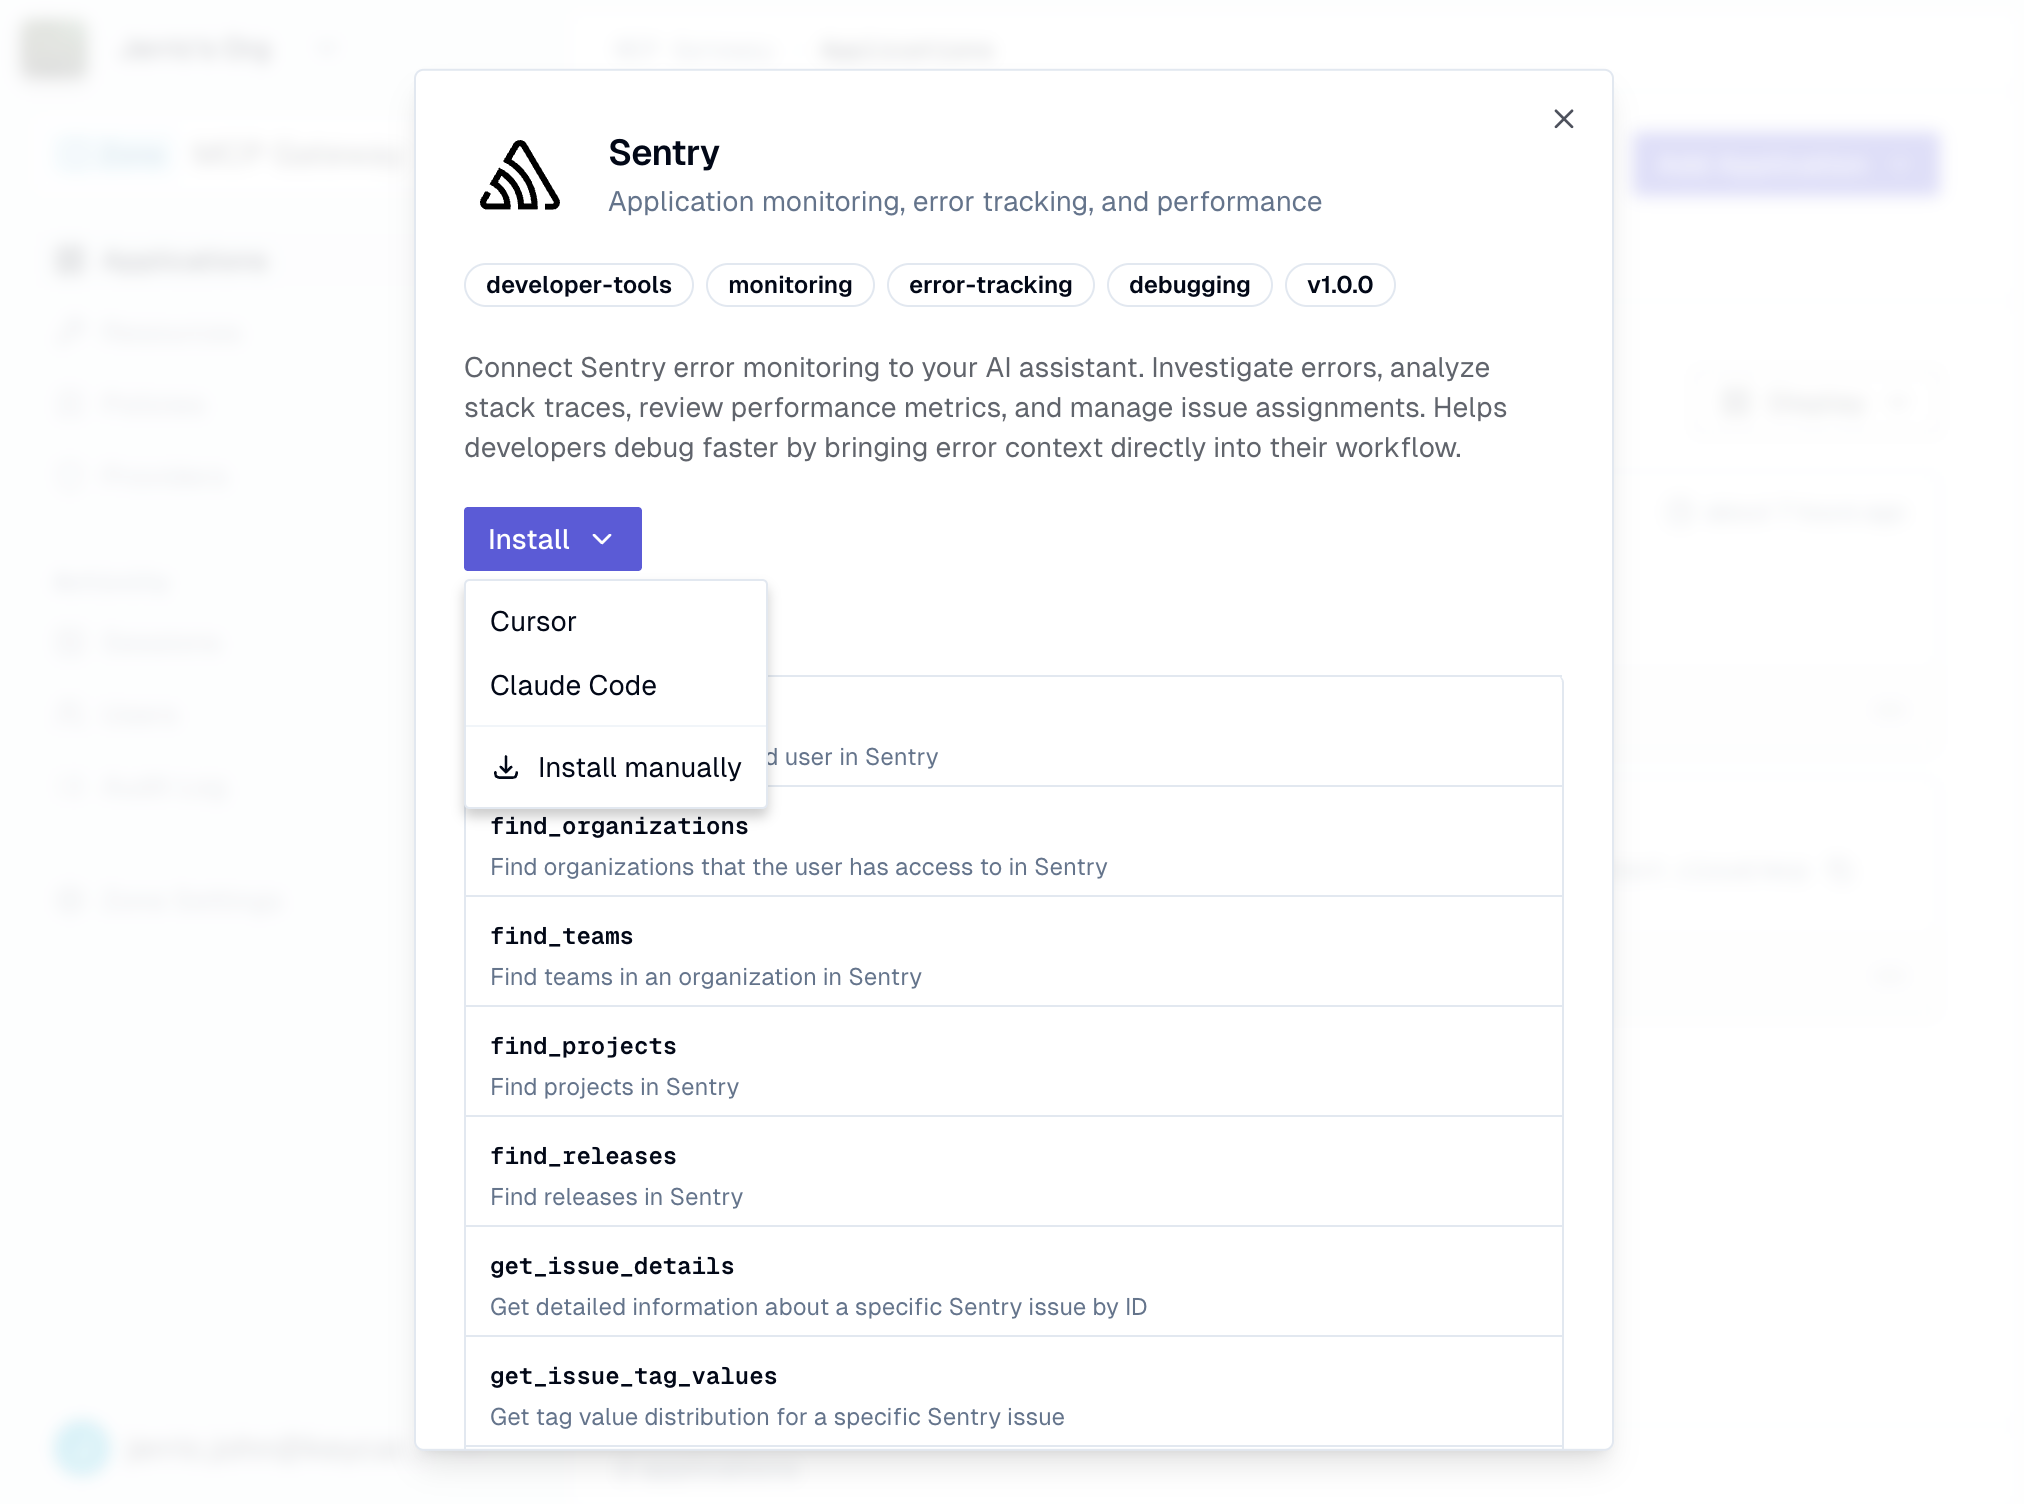
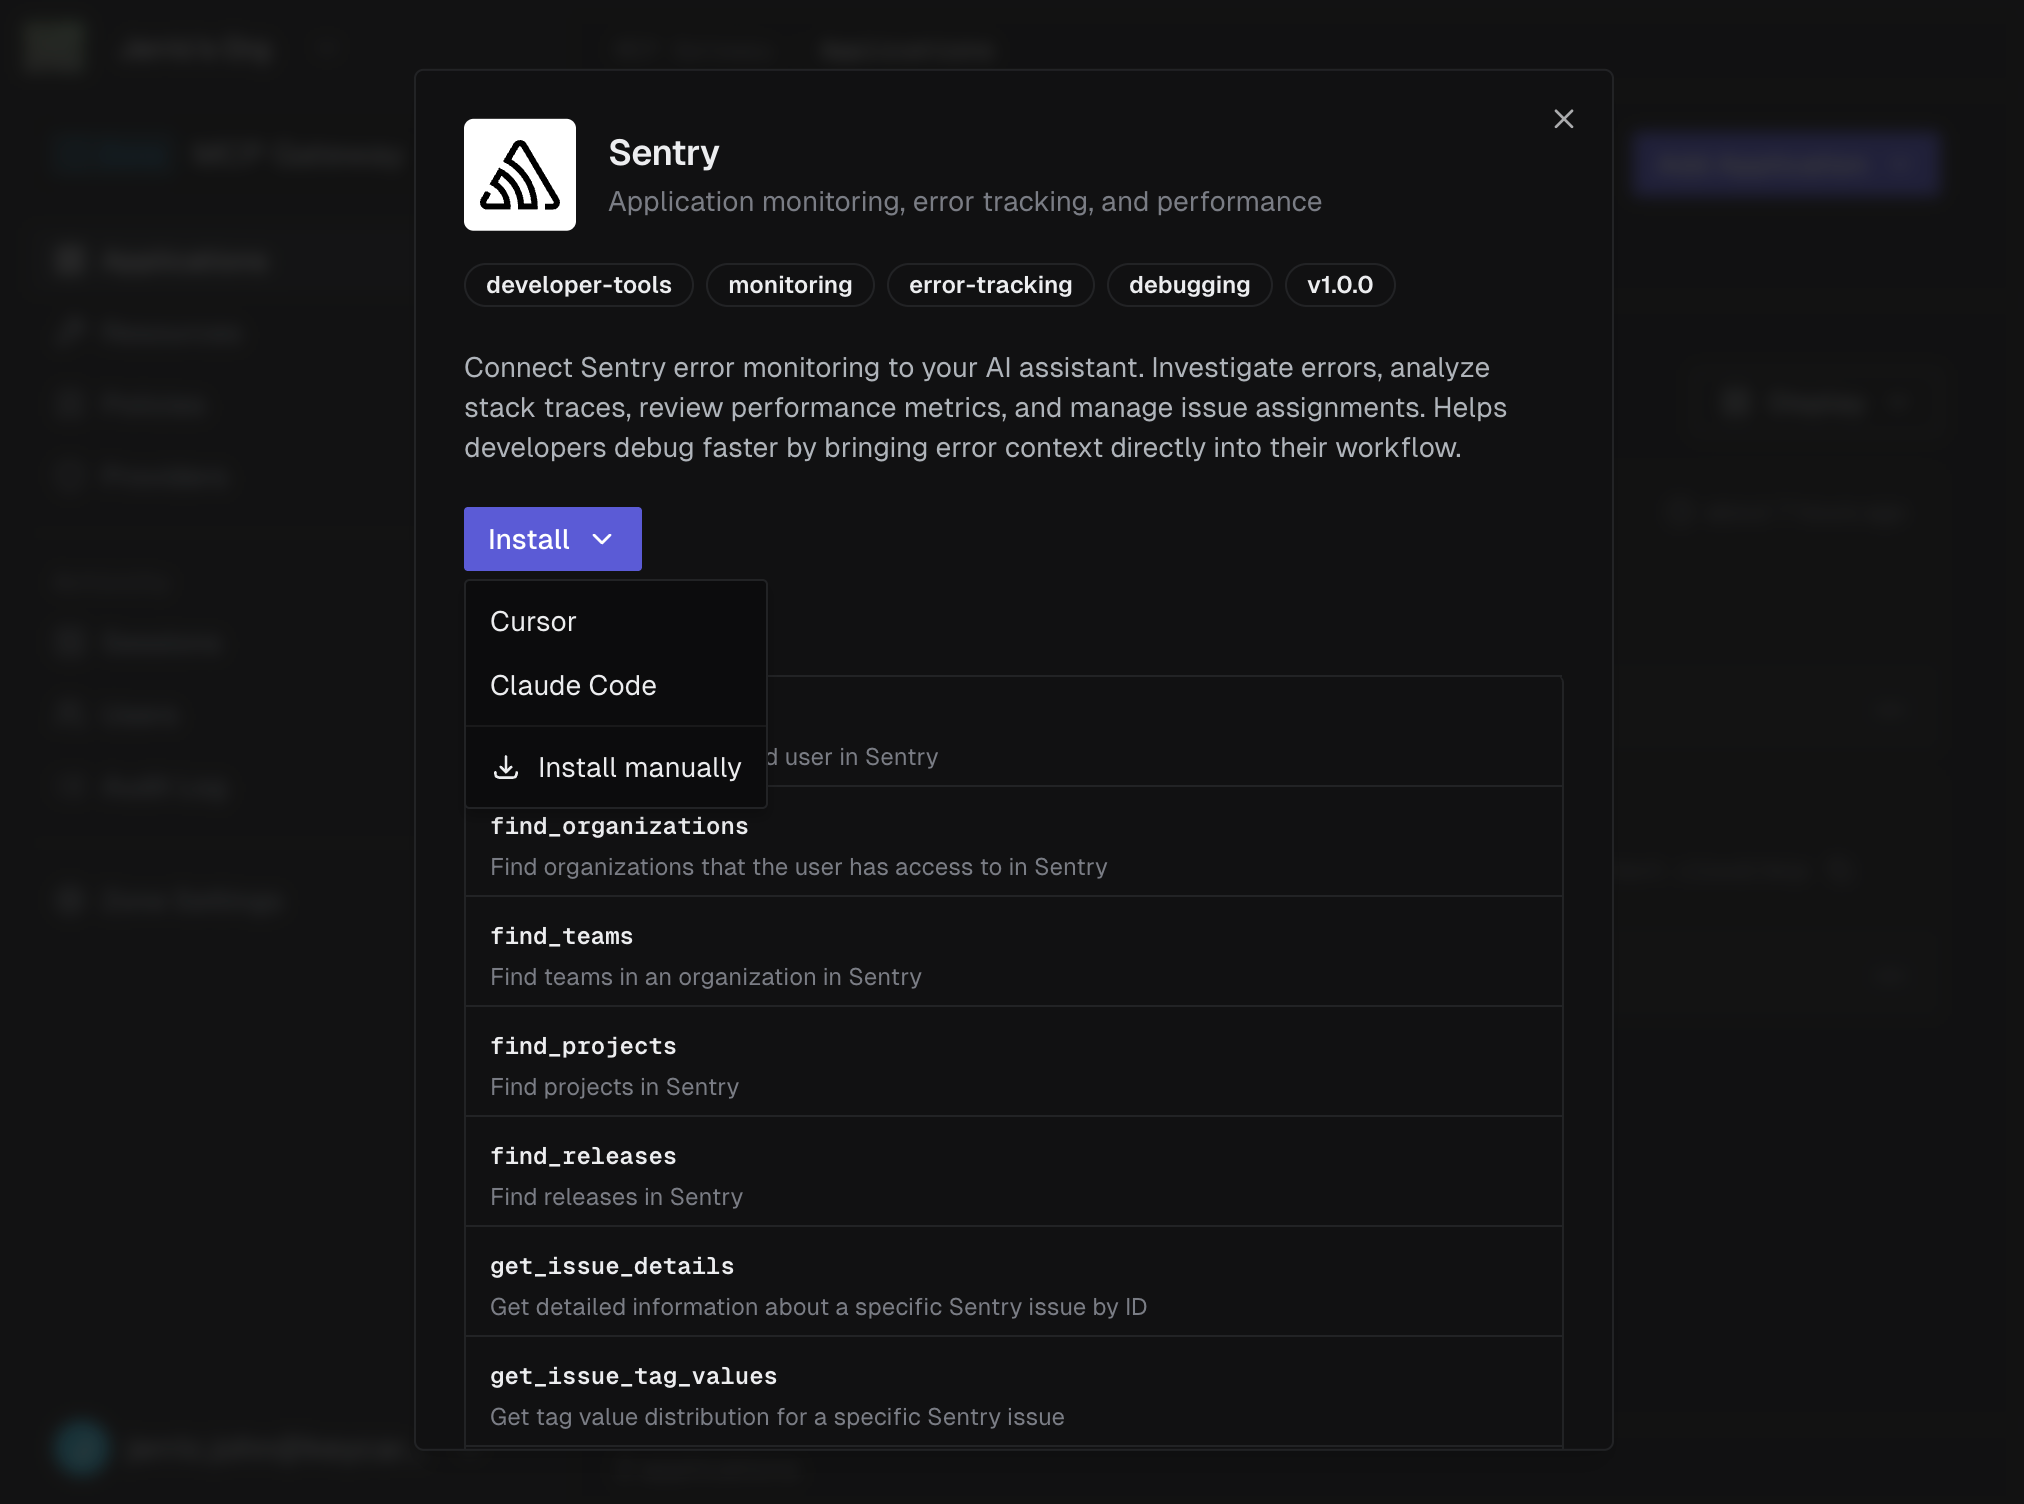
The detail view shows the server’s description, tags, version, and available tools. Click Install to add it to your Keycard MCP Gateway.
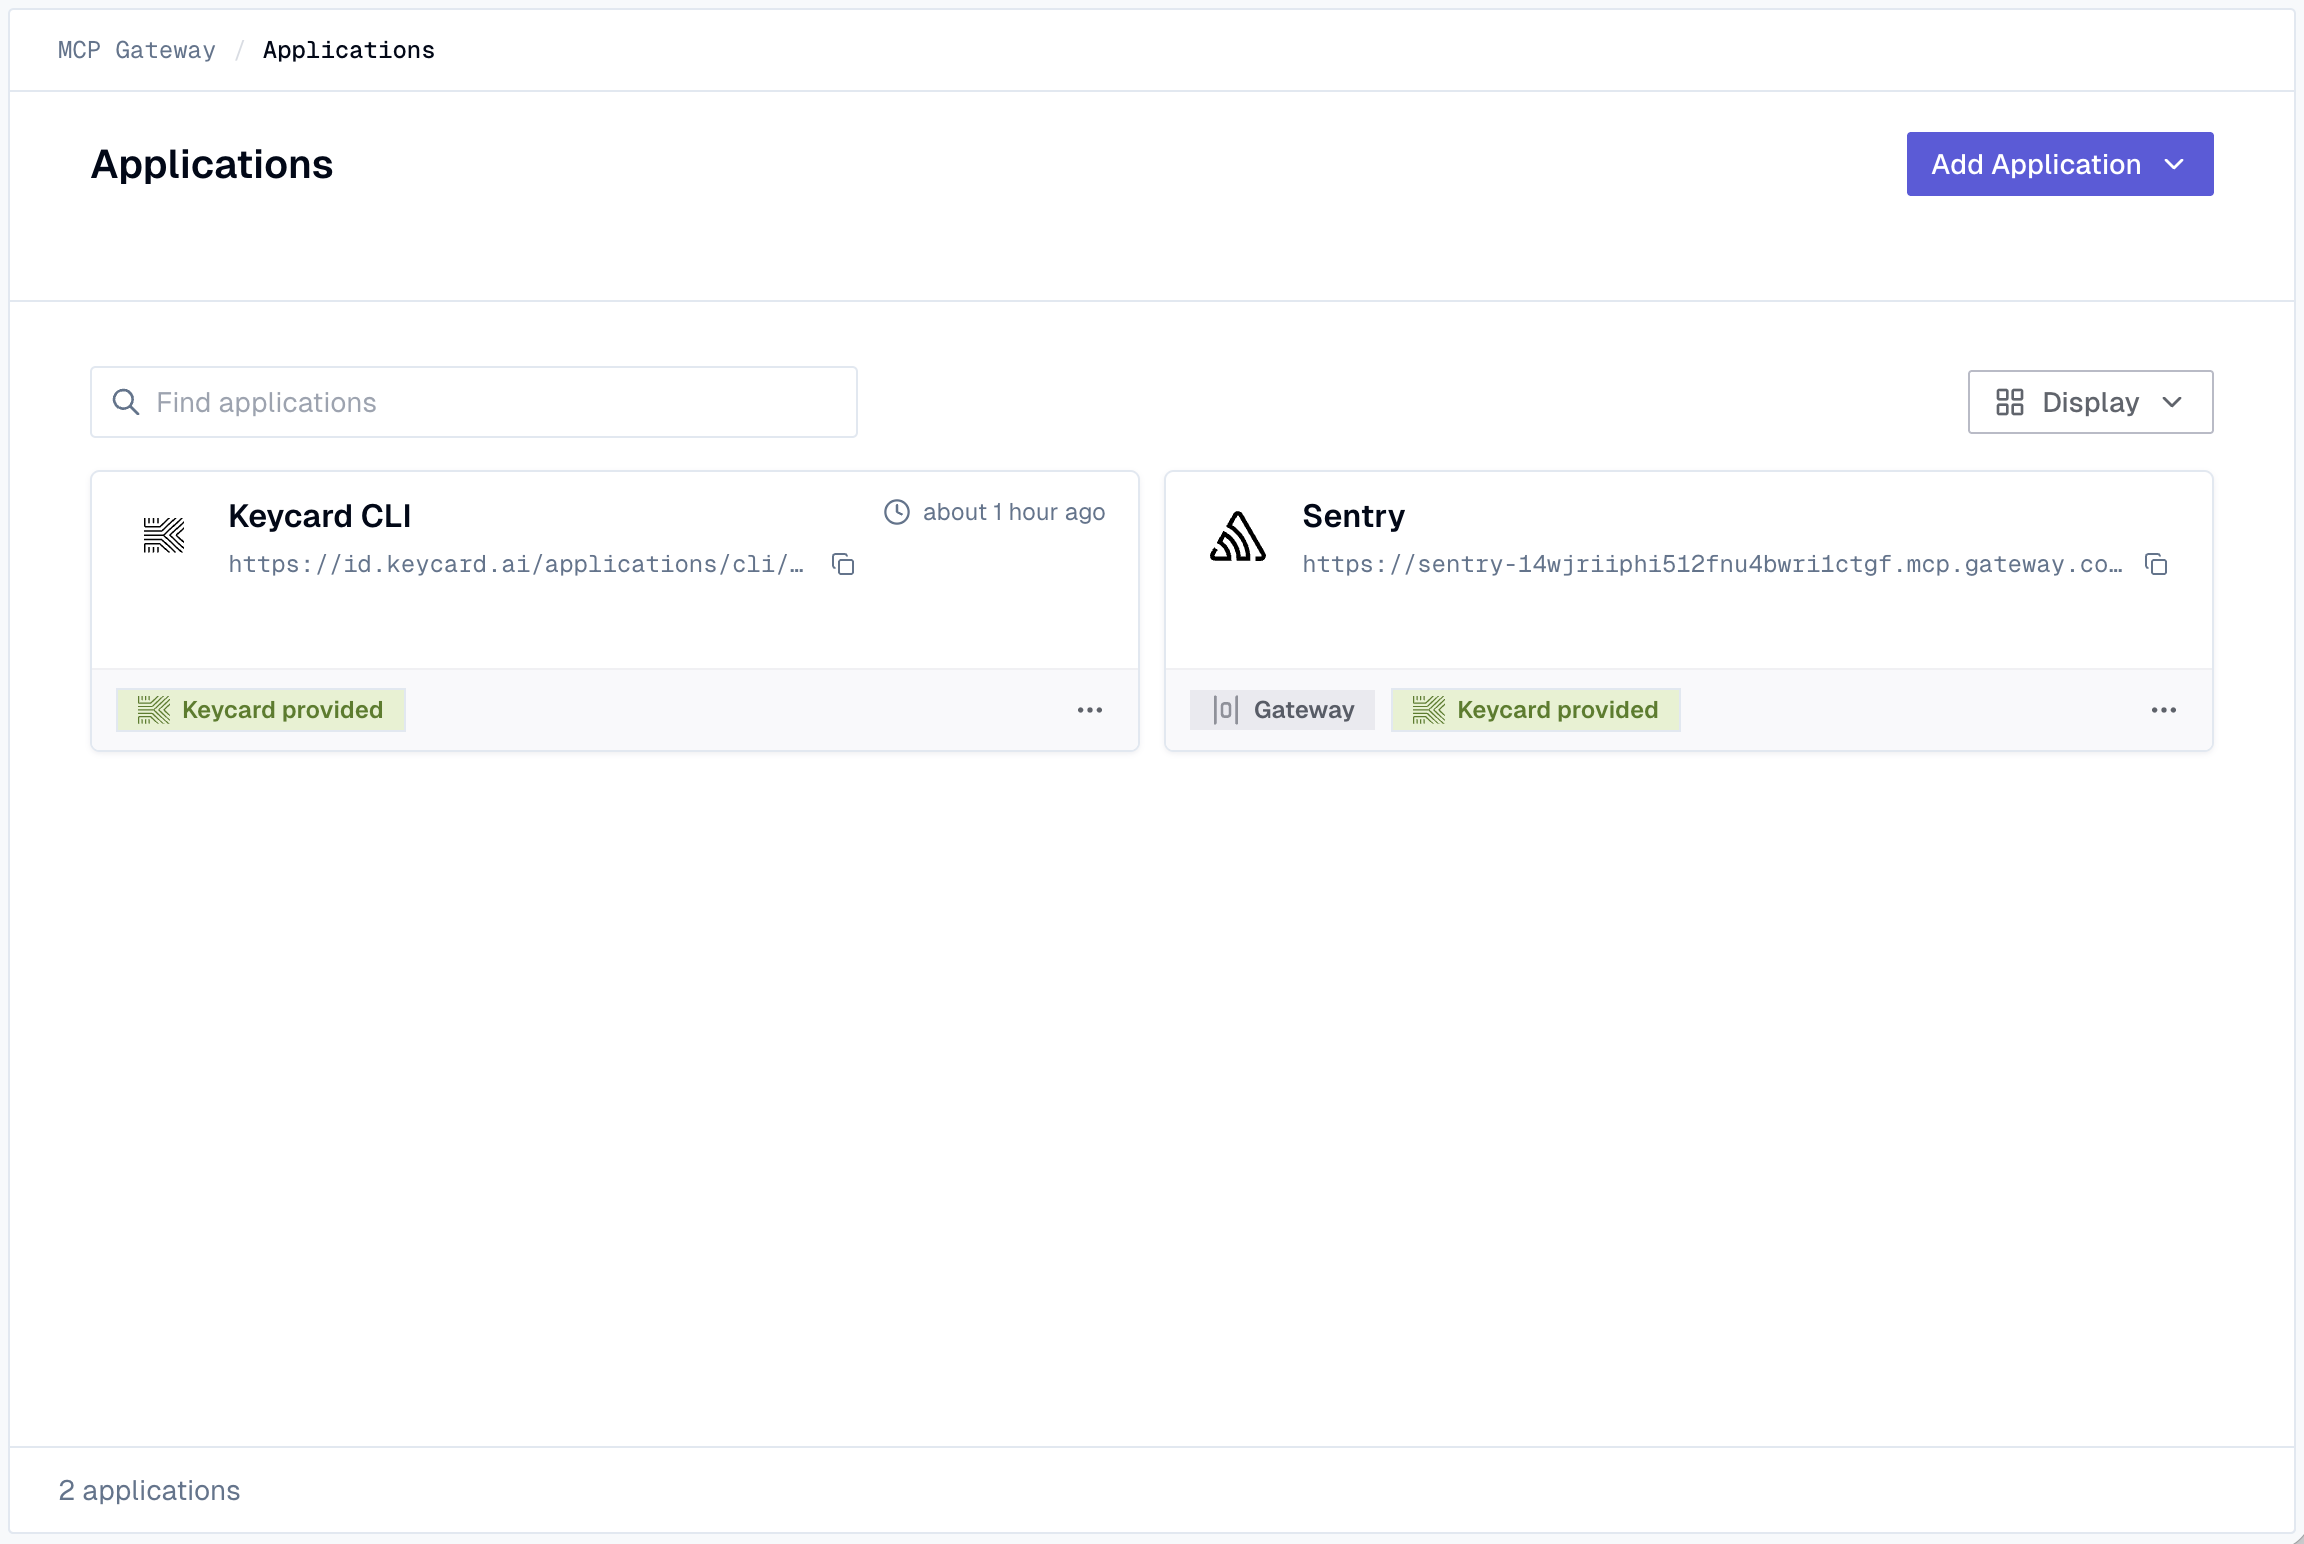
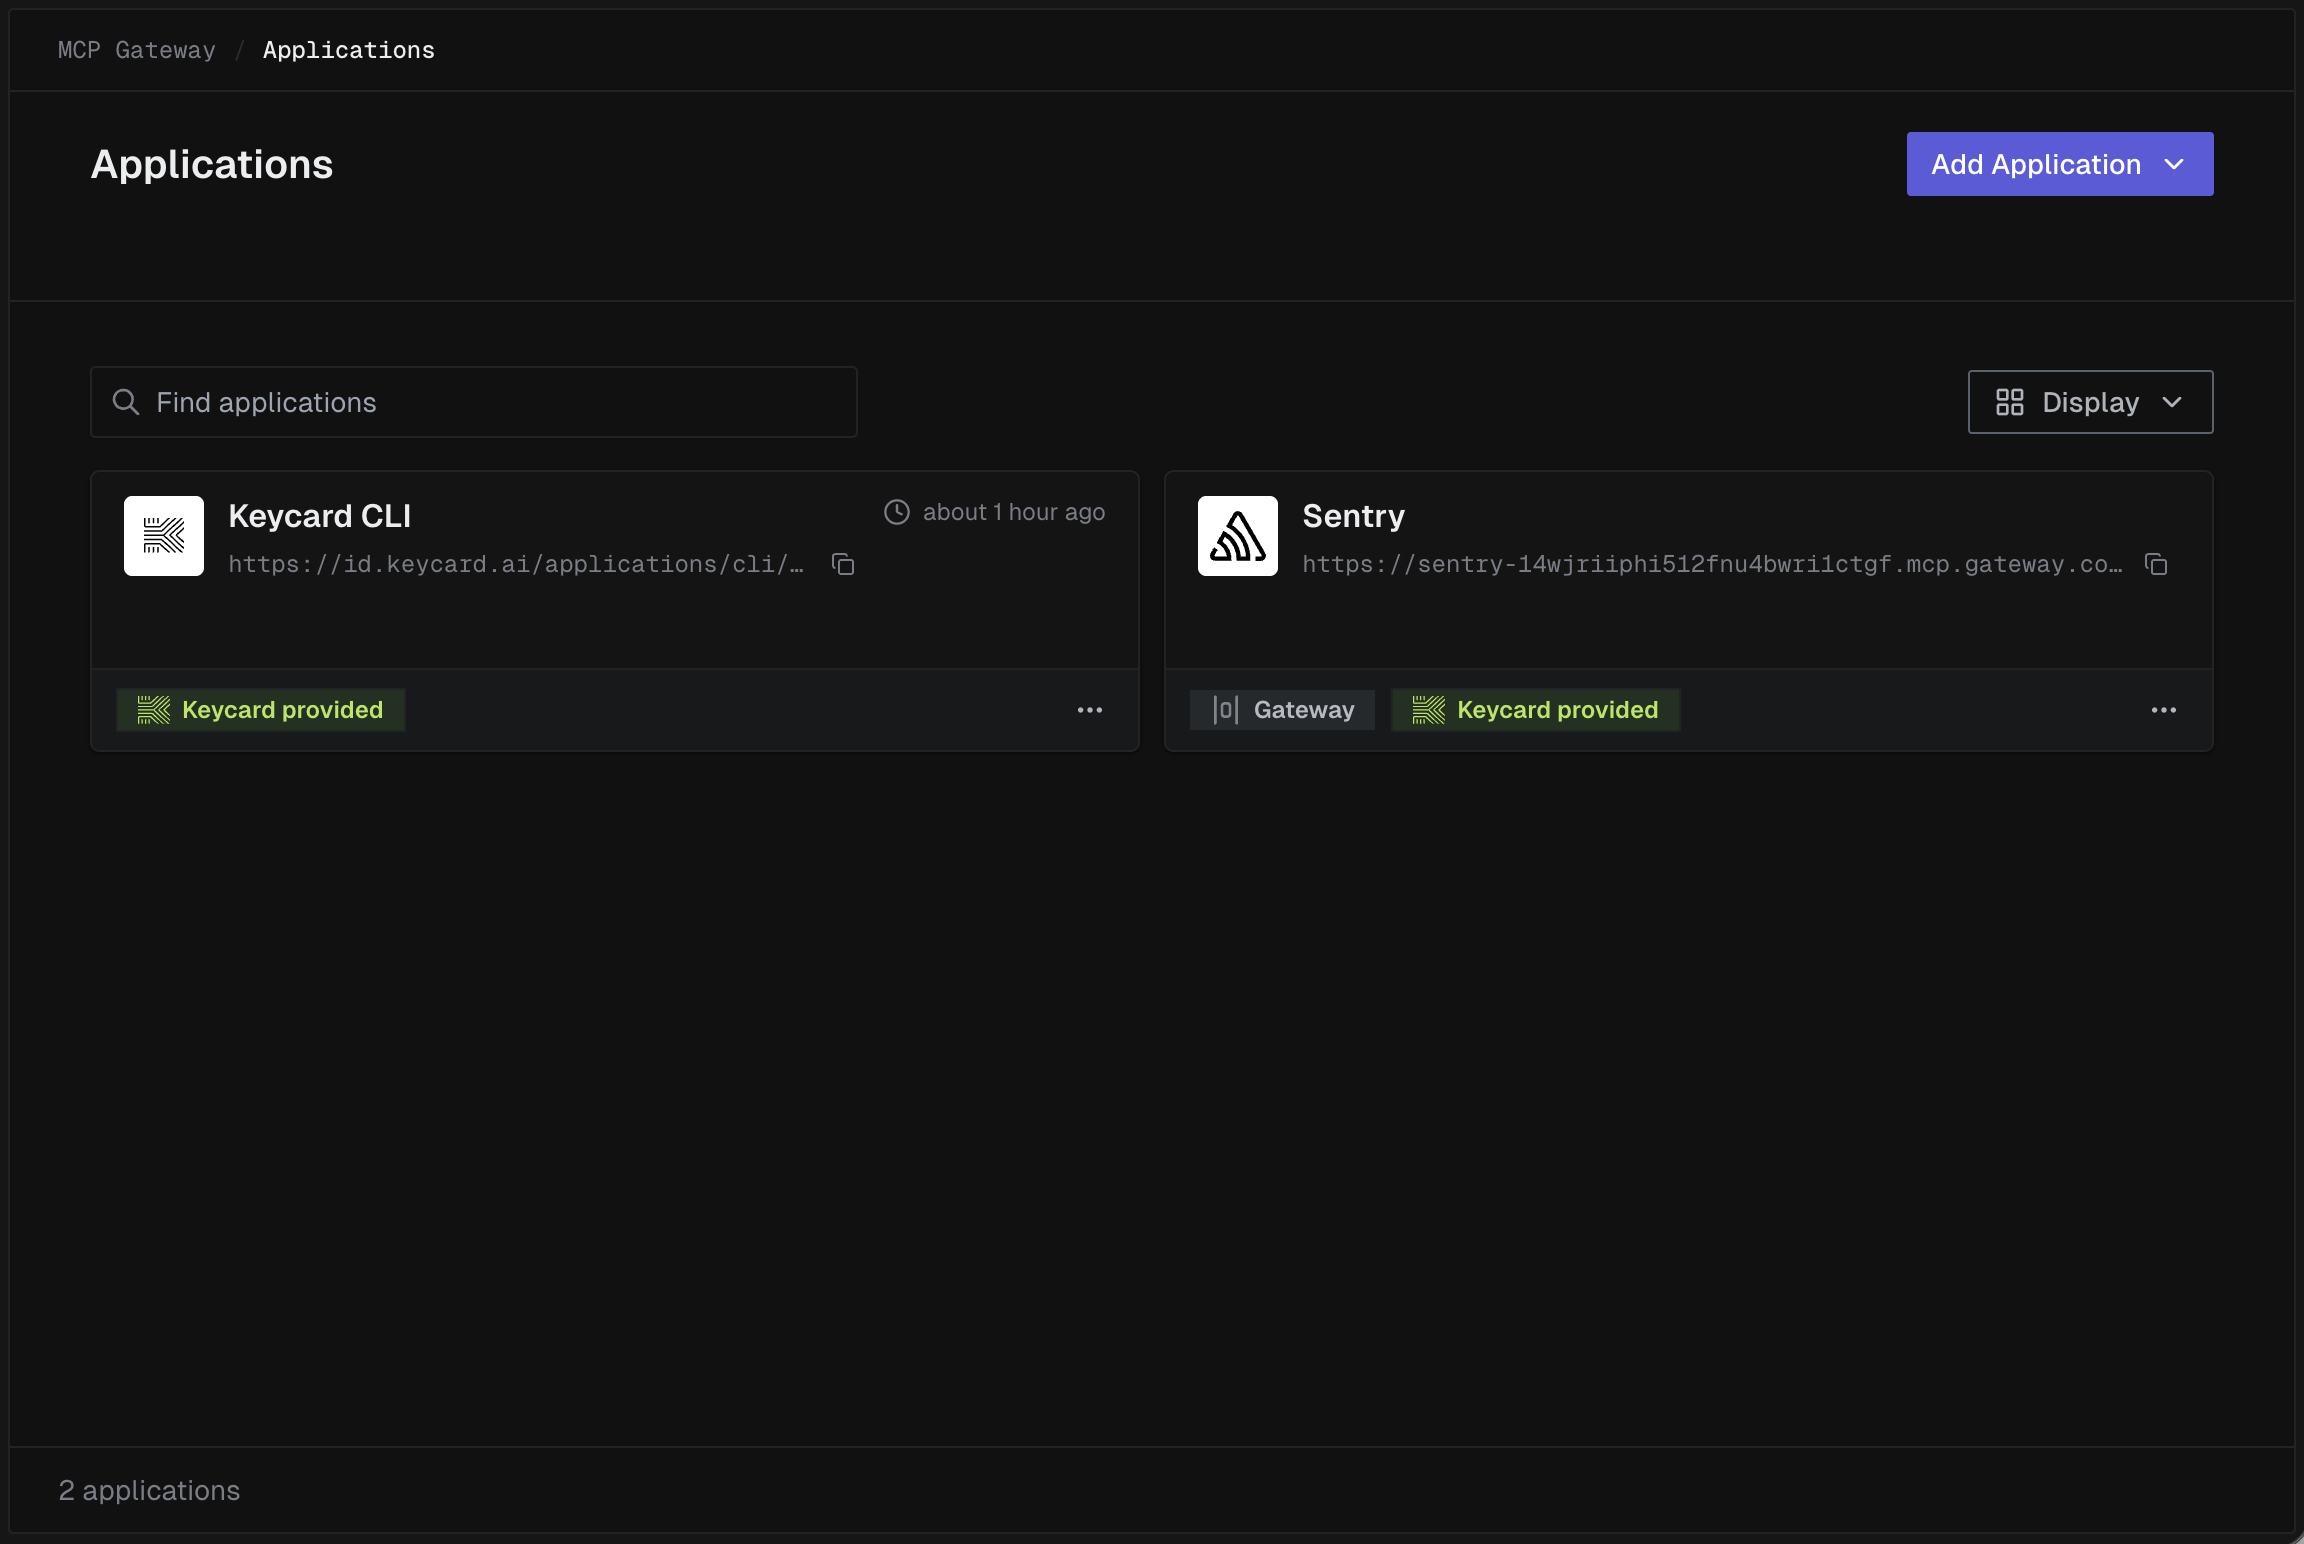
Once installed, the server appears as an application on the Applications page with a Keycard MCP Gateway URL.
Step 2: Connect to Your Development Tool
Section titled “Step 2: Connect to Your Development Tool”Click the installed application to open its detail dialog. Use the Install dropdown to connect the Keycard MCP Gateway-protected server to your development tool.
-
Select Cursor from the Install dropdown
Your browser asks to open Cursor. Click Open Cursor to continue.
-
Confirm the installation
Cursor opens its Tools & MCP settings with the server pre-filled. Click Install to add it.
-
Authenticate
The server initially shows Needs authentication. Click Connect to start the auth flow.
-
Start using the tools
Once authenticated, the server shows a green status indicator with the number of available tools.
-
Select Claude Code from the Install dropdown
A dialog appears with a
claude mcp addcommand and three scope options:- User (recommended) - available across all your projects
- Project - shared with your team via
.mcp.json - Local - private to you, current project only
-
Copy and run the command
Copy the command and run it in your terminal:
Terminal window claude mcp add --transport http --scope user <server-name> <gateway-url> -
Authenticate when prompted
The first time Claude Code calls a tool from this server, you’ll authenticate through your browser.
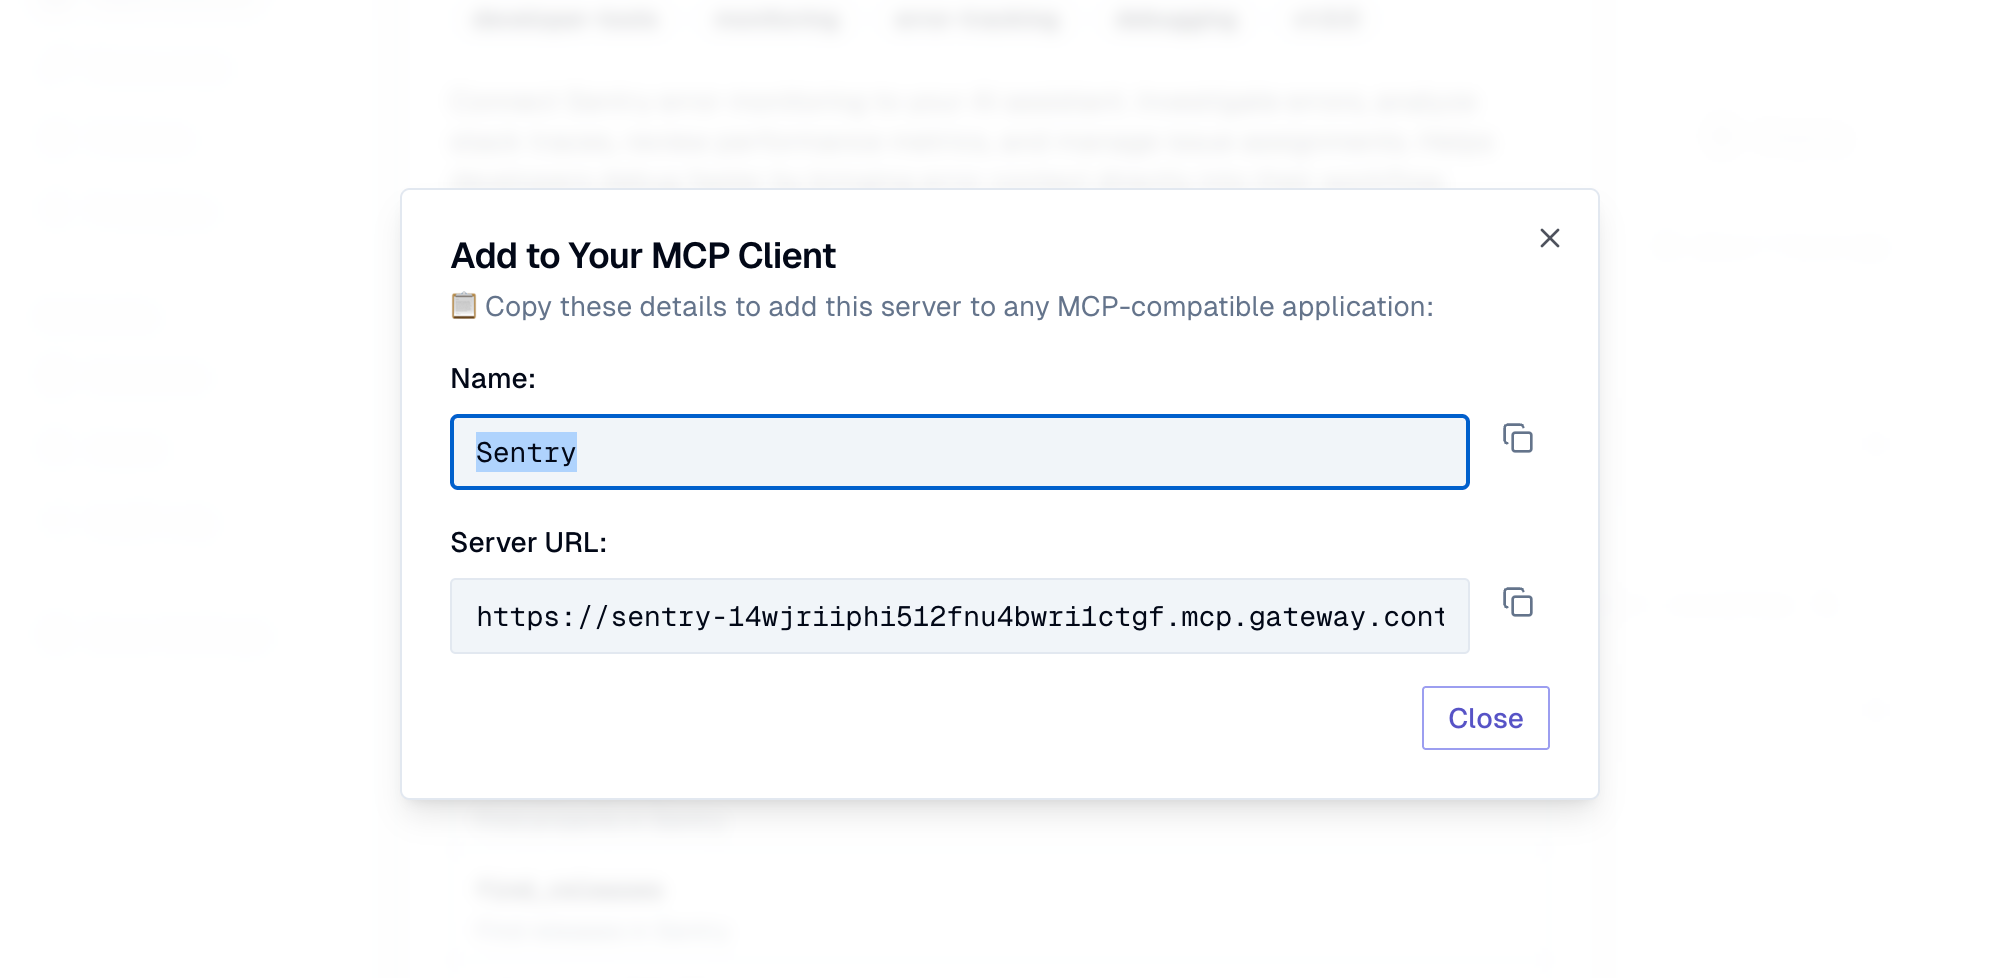
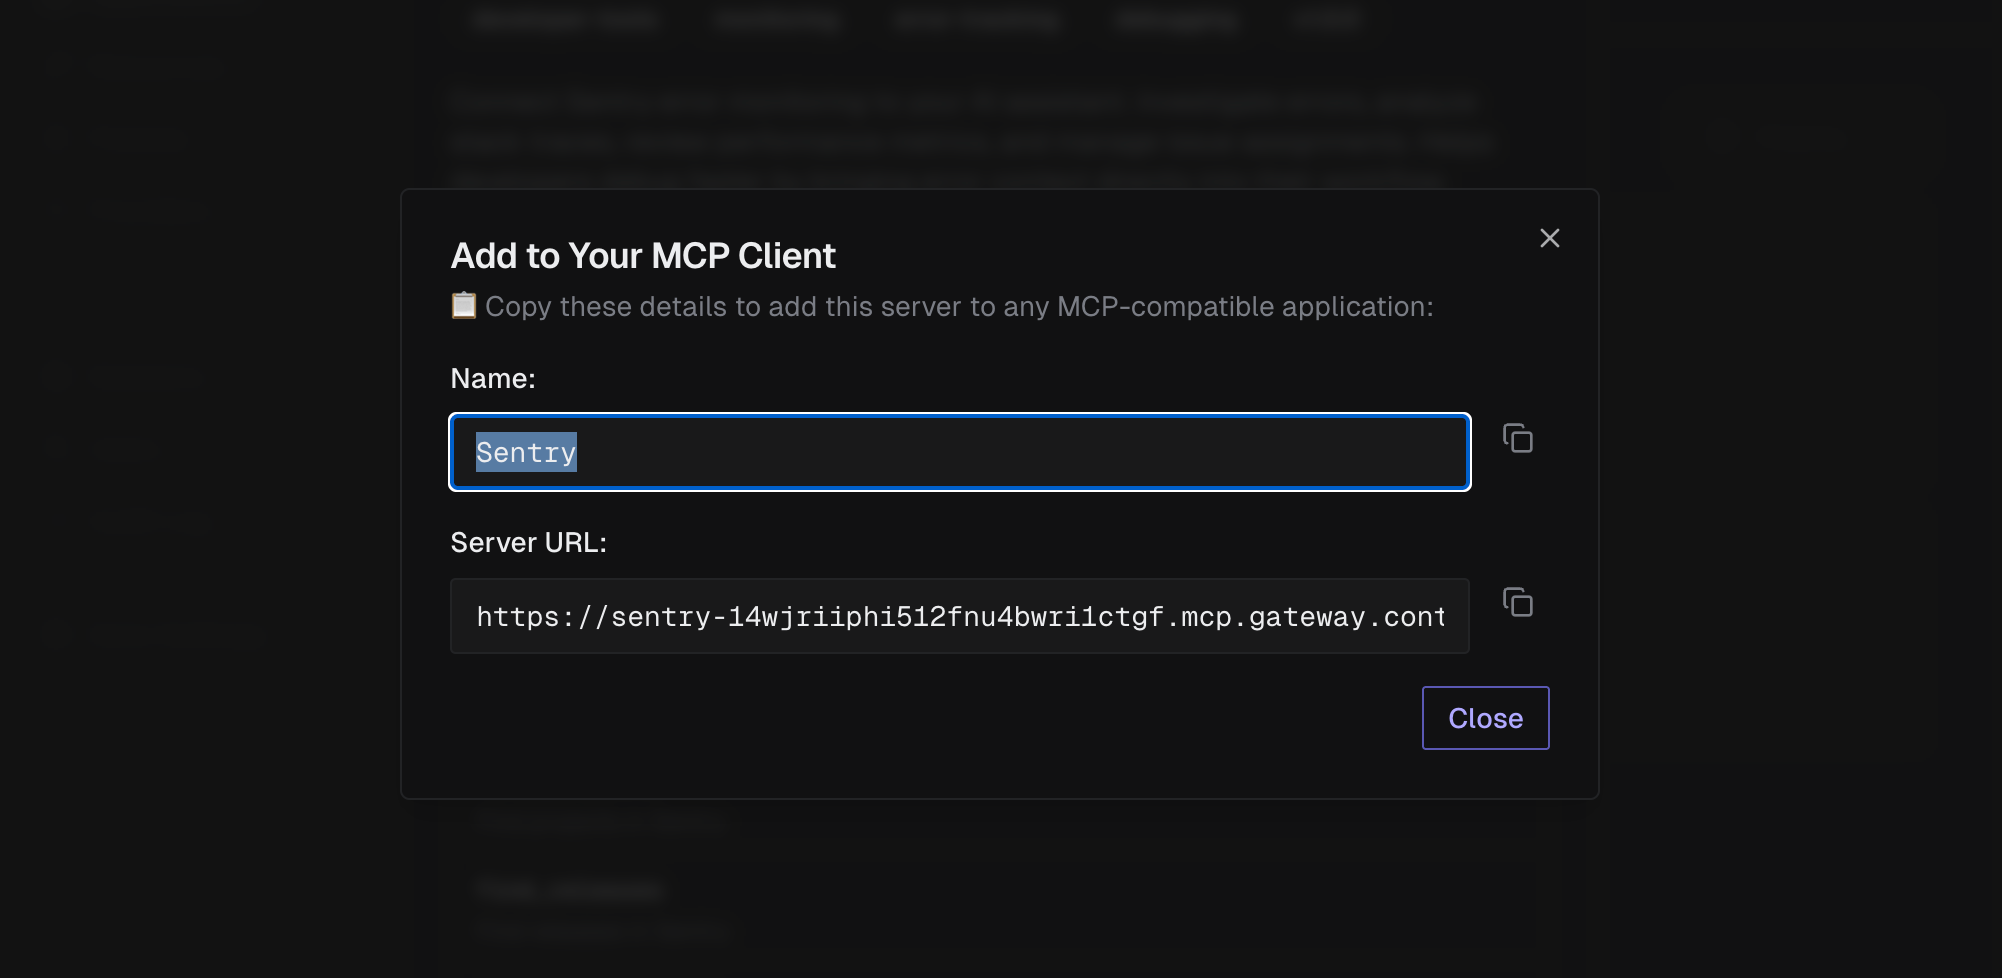
Select Install manually to see the server Name and Server URL. Copy these values into any MCP-compatible client that supports HTTP transport.
Authentication Flow
Section titled “Authentication Flow”The first time a user connects to an MCP server through the Keycard MCP Gateway from their development tool, they complete a two-step authentication:
-
Identity provider sign-in - sign in with your zone’s identity provider (e.g., Okta) to verify your identity
-
MCP server authorization - the remote MCP server (e.g., Axiom) asks you to approve access, then Keycard manages tokens on your behalf
After both steps, you see an Authentication Successful confirmation. Return to your development tool to complete the connection where it started.
Keycard handles token refresh automatically.