Keycard supports any OIDC identity provider, including Okta and Azure Entra ID. Users are automatically provisioned Just-in-Time (JIT) on first login.
Prerequisites
Section titled “Prerequisites”- Admin access to your Keycard organization
- Admin access to your identity provider
Step 1: Configure your identity provider
Section titled “Step 1: Configure your identity provider”Use your organization’s Redirect URL, found in Keycard Console under Settings → Connection.
- In your Okta Admin Console, go to Applications > Create App Integration
- Select OIDC - OpenID Connect and Web Application
- Configure the application:
- Sign-in redirect URIs: the Redirect URL you copied above
- Save the Client ID, Client Secret, and Issuer (found in your Okta domain, e.g.,
https://<your-domain>.okta.com)
- In the Azure Portal, go to Microsoft Entra ID > App registrations > New registration
- Configure the application:
- Name: Choose a name for your app
- Supported account types: Accounts in this organizational directory only (Single tenant)
- Redirect URI: Select Web and enter the Redirect URL you copied above
- After creation, go to Certificates & secrets and create a new client secret
- Save the Application (client) ID, Client Secret, and Issuer (
https://login.microsoftonline.com/<tenant-id>/v2.0)
Create an OAuth 2.0 / OIDC application in your identity provider with these settings:
- Application type: Web application
- Redirect URI: the Redirect URL you copied above
- Grant types: Authorization Code
Save the Client ID, Client Secret, and Issuer URL.
Step 2: Link identity provider to Keycard
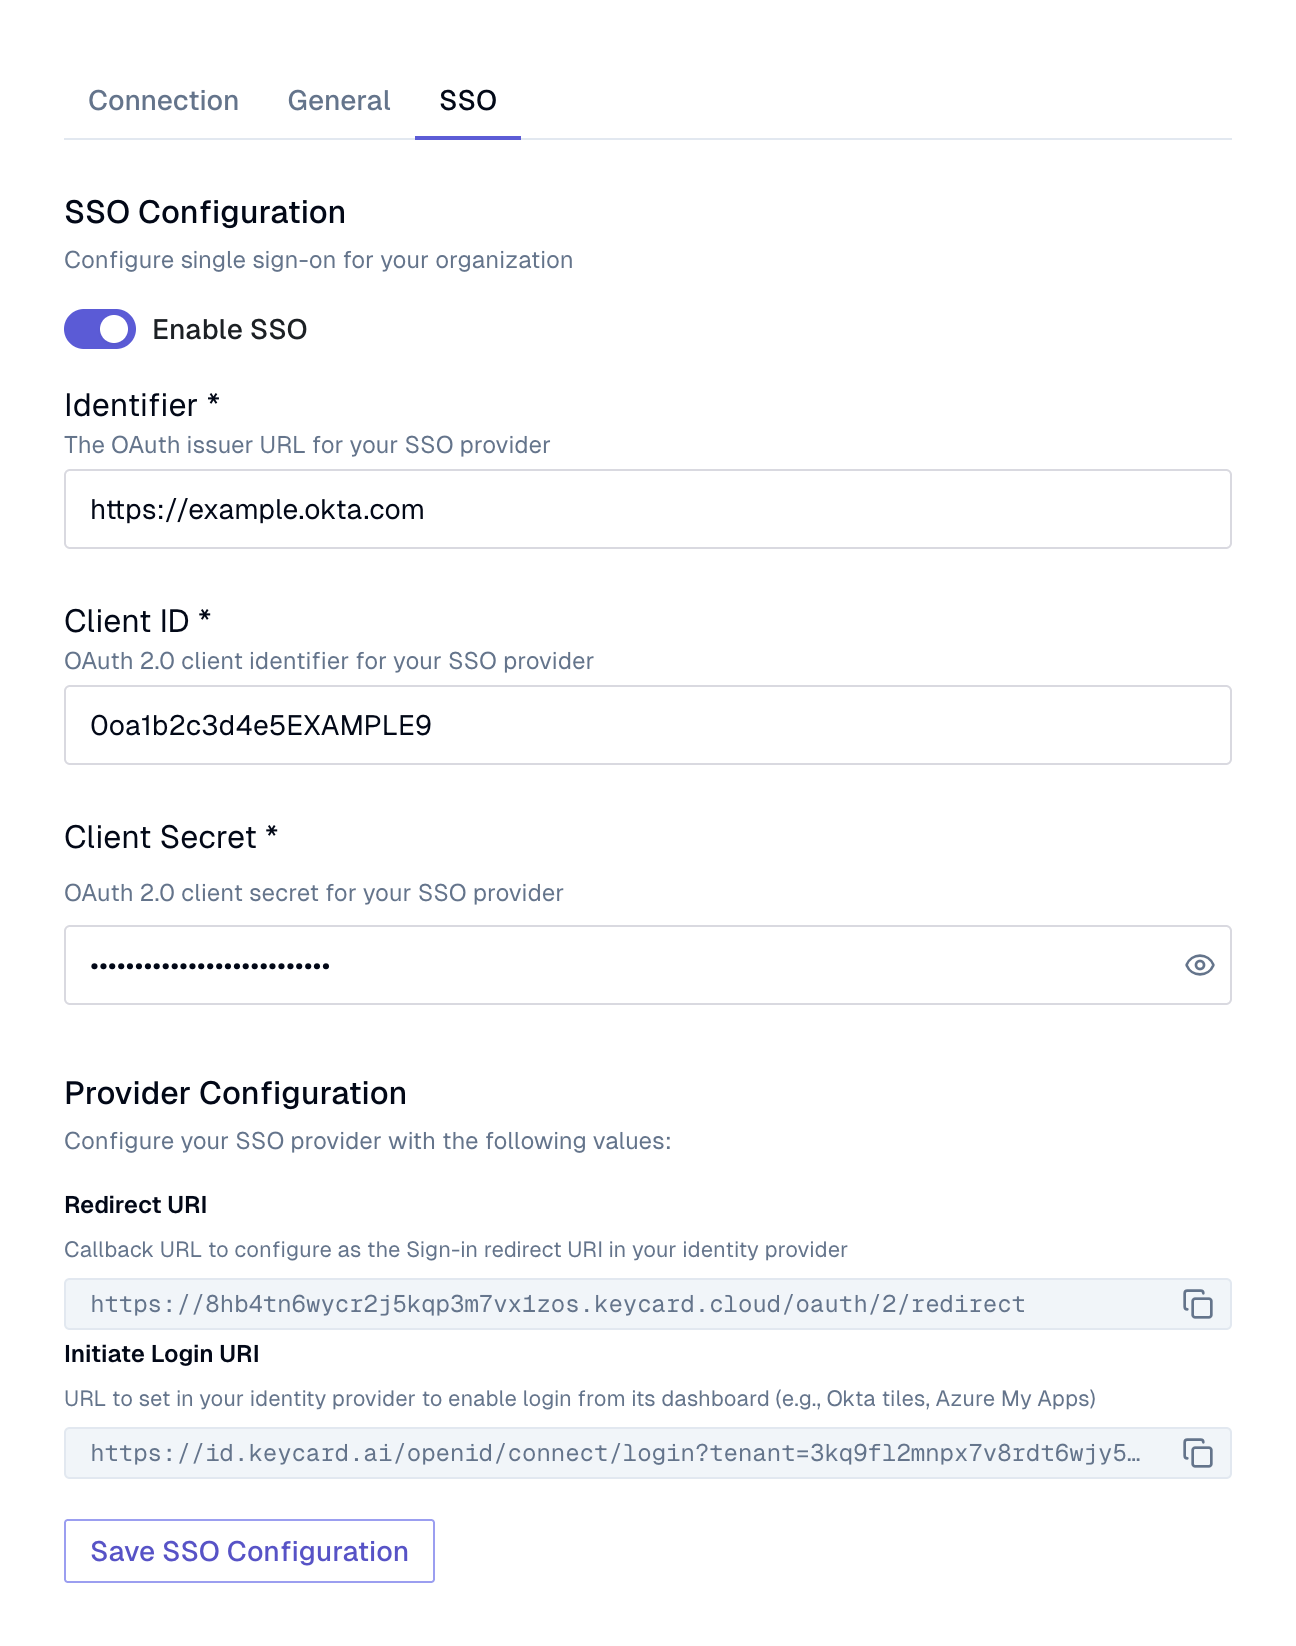
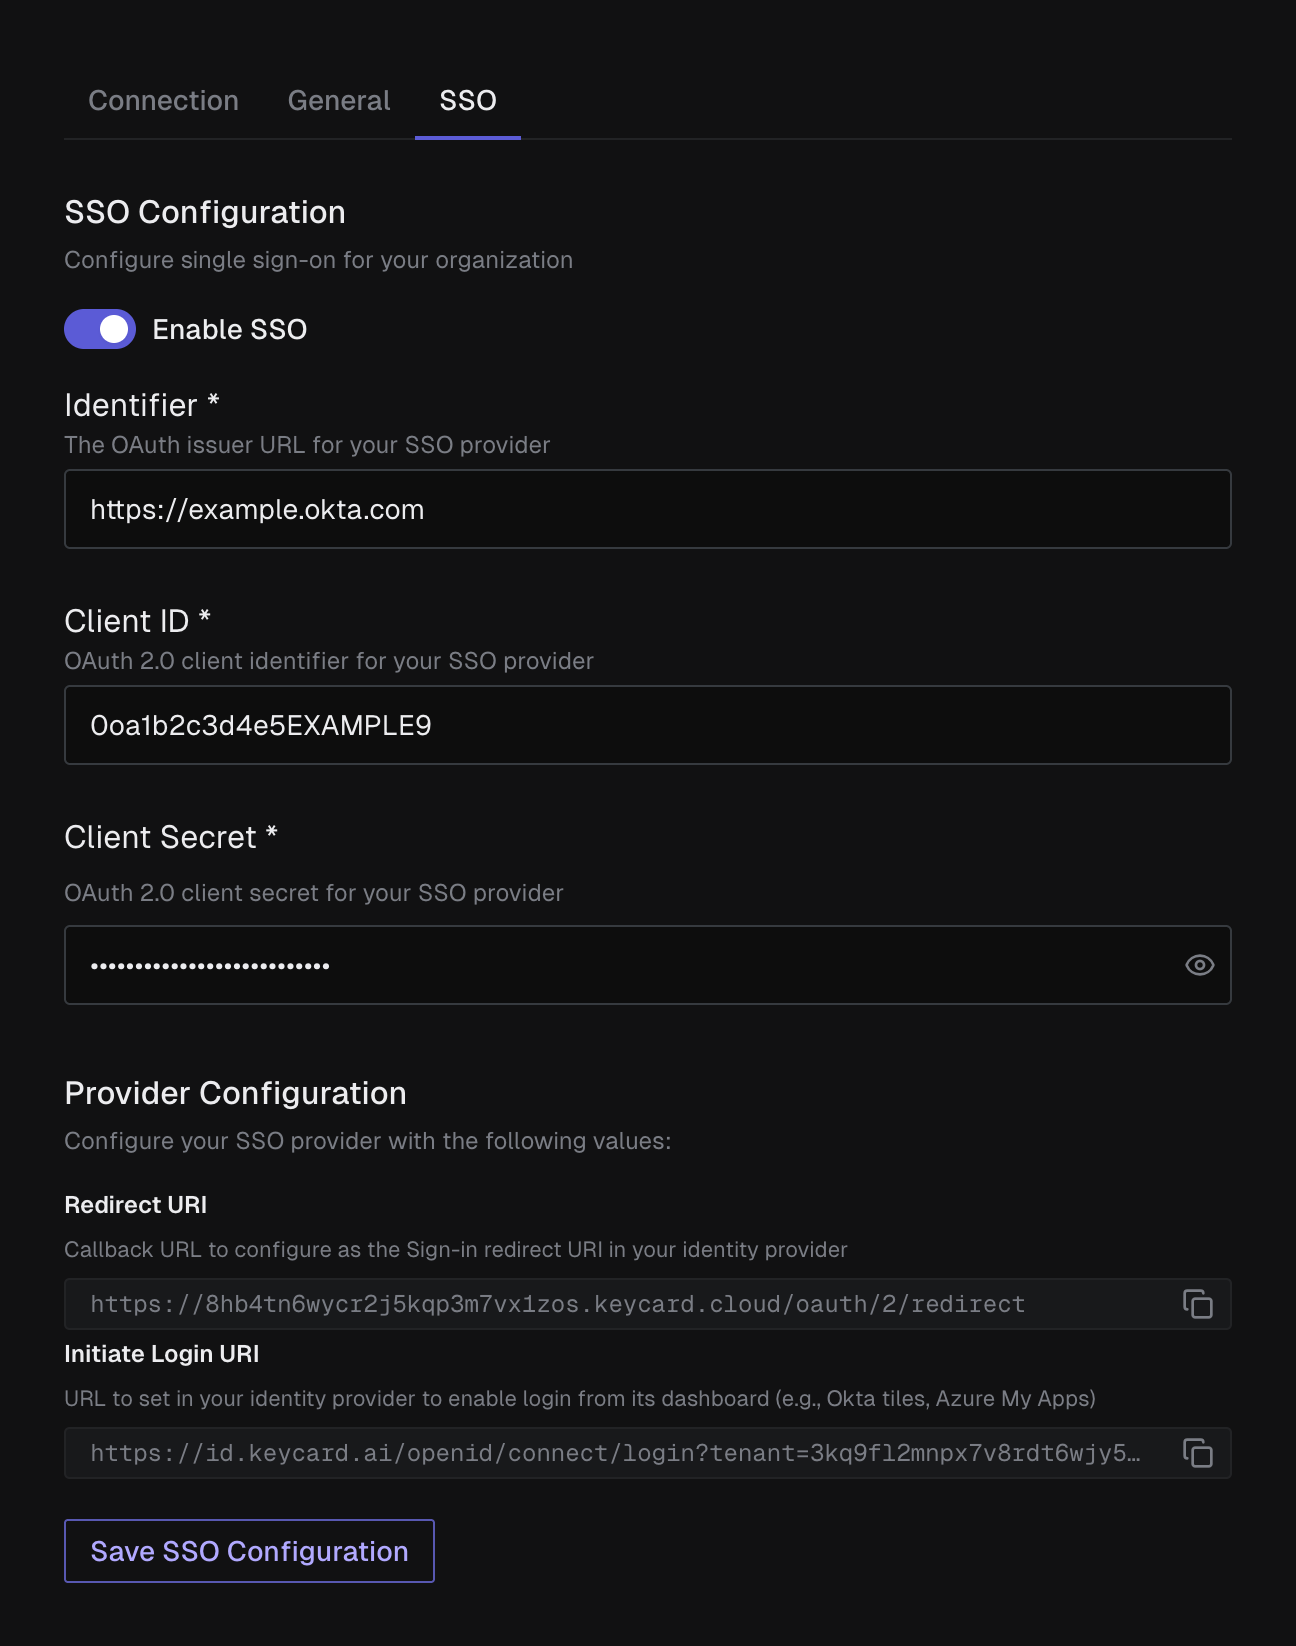
Section titled “Step 2: Link identity provider to Keycard”Configure an SSO connection from Settings → SSO in the Keycard Console, or via the Keycard Terraform provider. Turn on the Enable SSO toggle, then enter your identity provider’s Identifier (its OAuth issuer URL), Client ID, and Client Secret.
Step 3: Test authentication
Section titled “Step 3: Test authentication”- Test login through your identity provider dashboard (see Login from Your Identity Provider for setup)
- Confirm successful login and user creation
Your SSO is now configured. Users can login from your identity provider dashboard.
User Roles and Access
Section titled “User Roles and Access”When users log in via SSO for the first time, they join your organization as a Viewer, which is read-only. To let someone manage Keycard, an Admin updates their role on the People page. See Roles & Permissions for details.
Domain Verification (Optional)
Section titled “Domain Verification (Optional)”Domain verification enables a seamless login experience at console.keycard.ai.
Without verification: Users access Keycard through your identity provider dashboard (Okta tiles, Azure My Apps)
With verification: Users enter their email at console.keycard.ai and are automatically redirected to your identity provider
To request verification, email help@keycard.ai with your organization name and the domain to verify. Keycard will verify you control the domain before enabling this feature.
After verification:
- Users with your verified email address domain must authenticate through your identity provider
- Entering an email with a verified domain automatically redirects to your identity provider
Note: The same domain cannot be reused across multiple organizations.
Emergency Access
Section titled “Emergency Access”For emergency access when your identity provider is unavailable, administrators can use this URL:
https://id.keycard.ai/openid/connect/login?tenant=personal&iss=https://id.keycard.ai&target_link_uri=https://console.keycard.aiThis enables non-SSO email/password accounts to authenticate.
Login from Your Identity Provider
Section titled “Login from Your Identity Provider”To enable users to login from your identity provider dashboard (Okta tiles, Azure My Apps), configure your identity provider with the Initiate Login URI, found in Settings → SSO under Provider Configuration.
URL format:
https://id.keycard.ai/openid/connect/login?iss=<issuer>&target_link_uri=https://console.keycard.ai&tenant=<org-id>Parameters:
iss: Your identity provider’s issuer URLtarget_link_uri: Where to redirect after login (e.g.,https://console.keycard.aior a specific page)tenant: Your Keycard organization ID (found in the Console under your organization settings page)
In your Okta application settings, set the Initiate login URI to:
https://id.keycard.ai/openid/connect/login?target_link_uri=https://console.keycard.ai&tenant=<org-id>Okta automatically includes the iss parameter, so you only need to specify target_link_uri and tenant. Replace <org-id> with your Keycard organization ID.
In your Azure application settings, set the Home page URL to:
https://id.keycard.ai/openid/connect/login?iss=https://login.microsoftonline.com/<tenant-id>/v2.0&target_link_uri=https://console.keycard.ai&tenant=<org-id>Replace <tenant-id> with your Azure tenant ID and <org-id> with your Keycard organization ID.
Configure your identity provider’s application launch URL or home page URL to:
https://id.keycard.ai/openid/connect/login?iss=<your-issuer-url>&target_link_uri=https://console.keycard.ai&tenant=<org-id>Replace <your-issuer-url> with your identity provider’s issuer URL and <org-id> with your Keycard organization ID.